Volumes
This page walks you through creating PVC-based Volumes and mounting them on Labs and Servings to share model files, datasets, and more.
Volume List
Click Volumes in the left sidebar to see the Volume list for the current project.
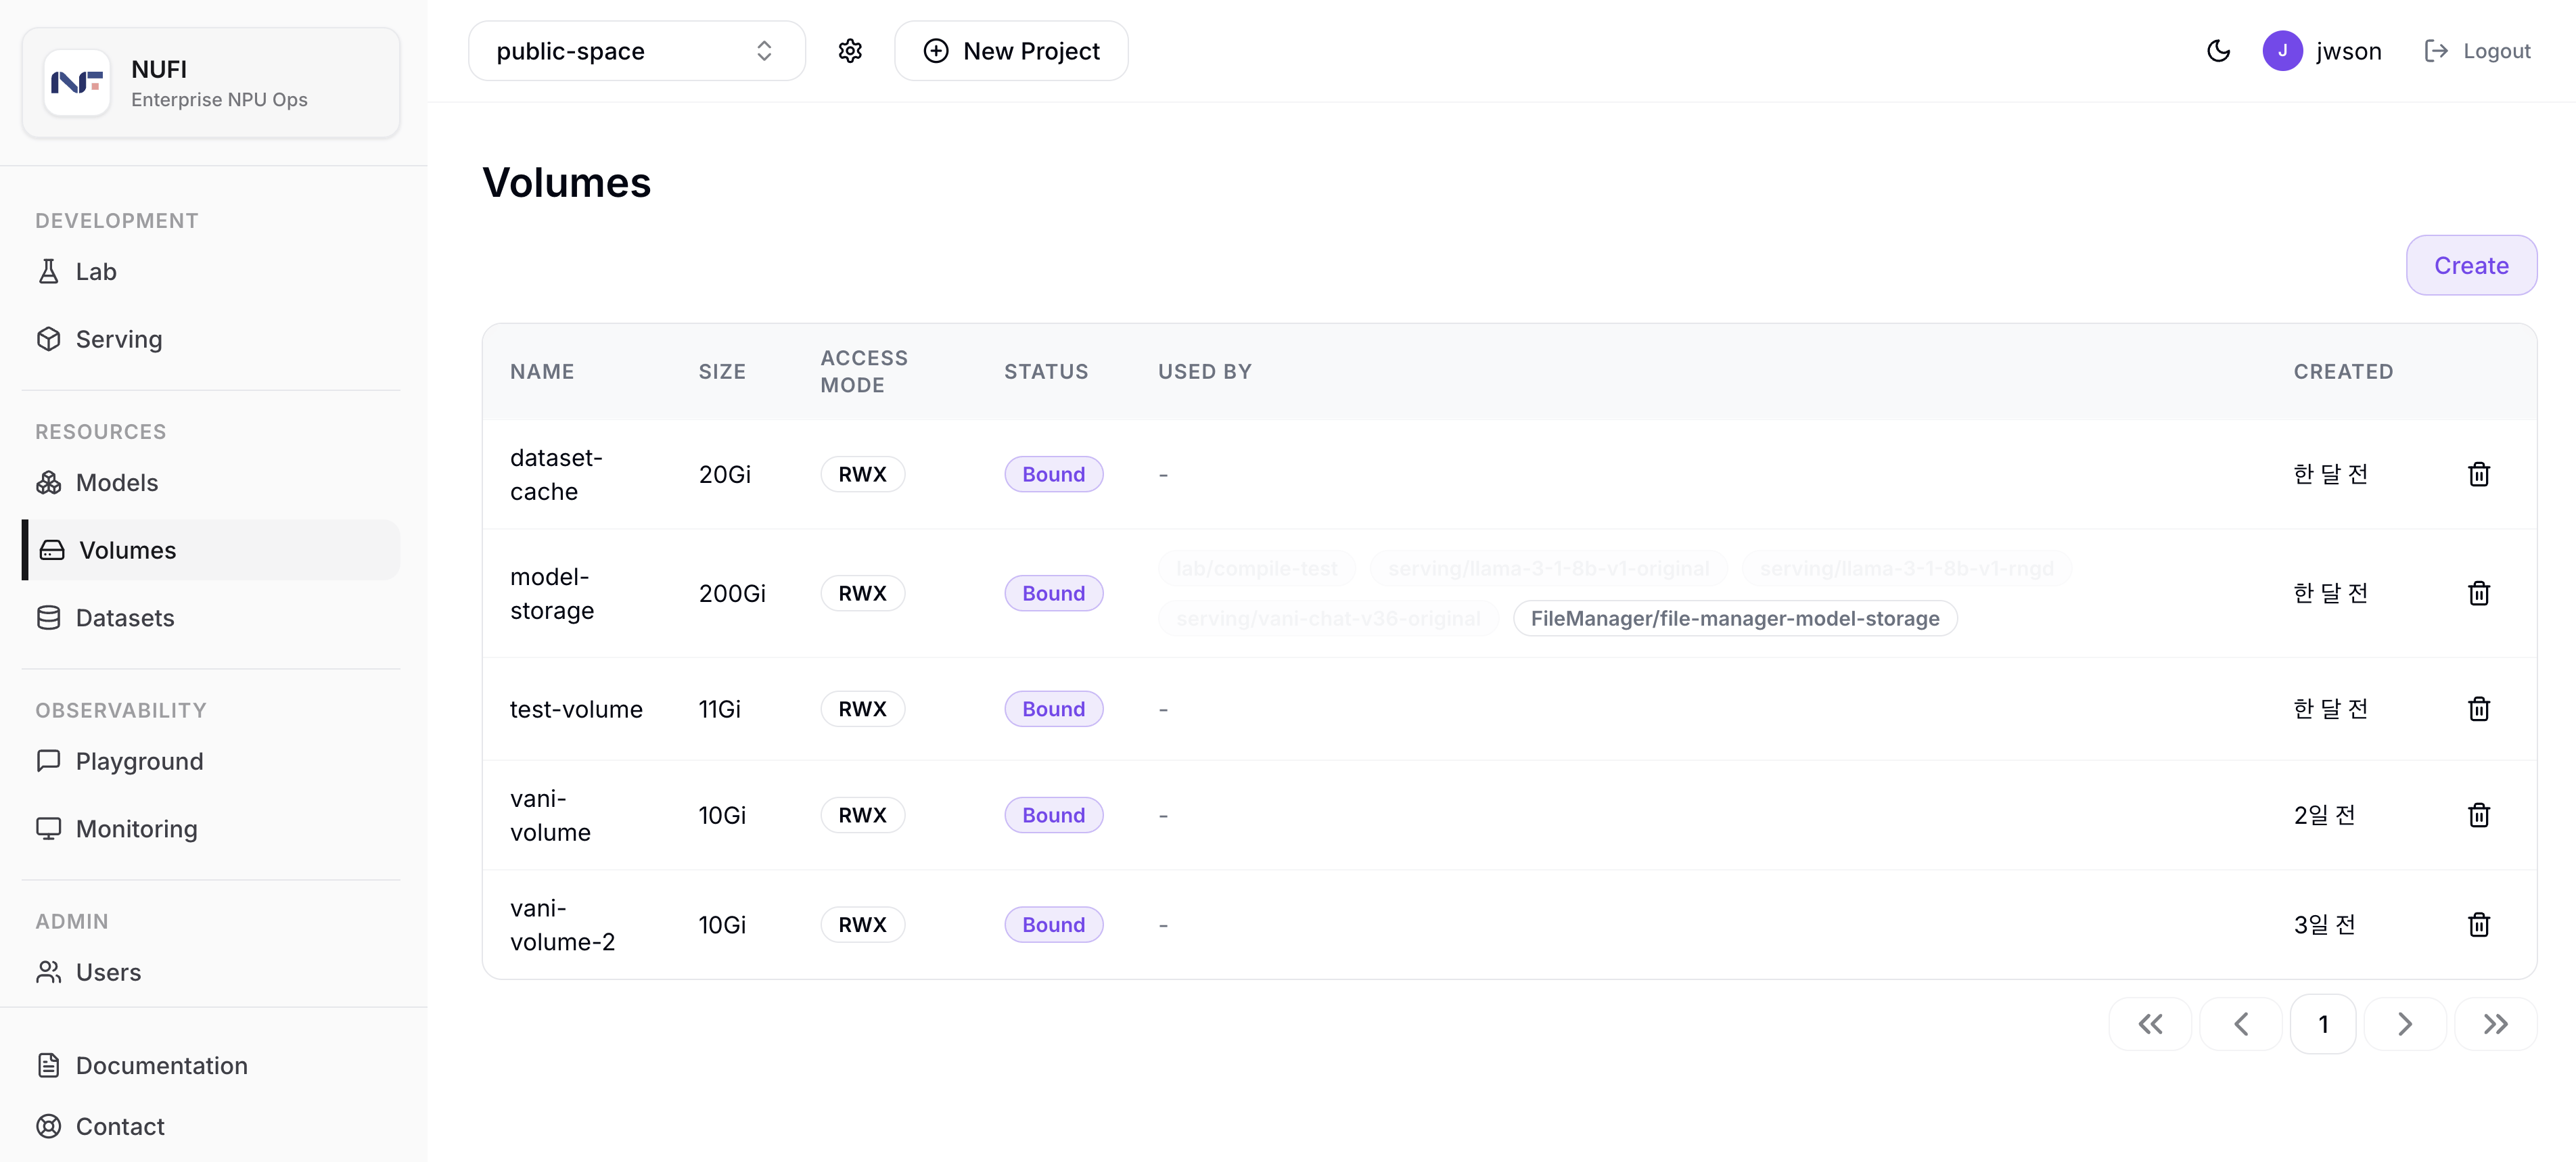
Columns
| Column | Description |
|---|---|
| Name | Volume name |
| Size | Volume capacity |
| Access Mode | Volume access mode (RWX, etc.) |
| Status | PVC binding status (Bound / Pending, etc.) |
| Used By | List of Labs / Servings currently mounting this Volume |
| Created | Creation time |
Create a Volume
- Click the Create button in the upper right of the Volume list page.
- Fill in the required information in the creation form.
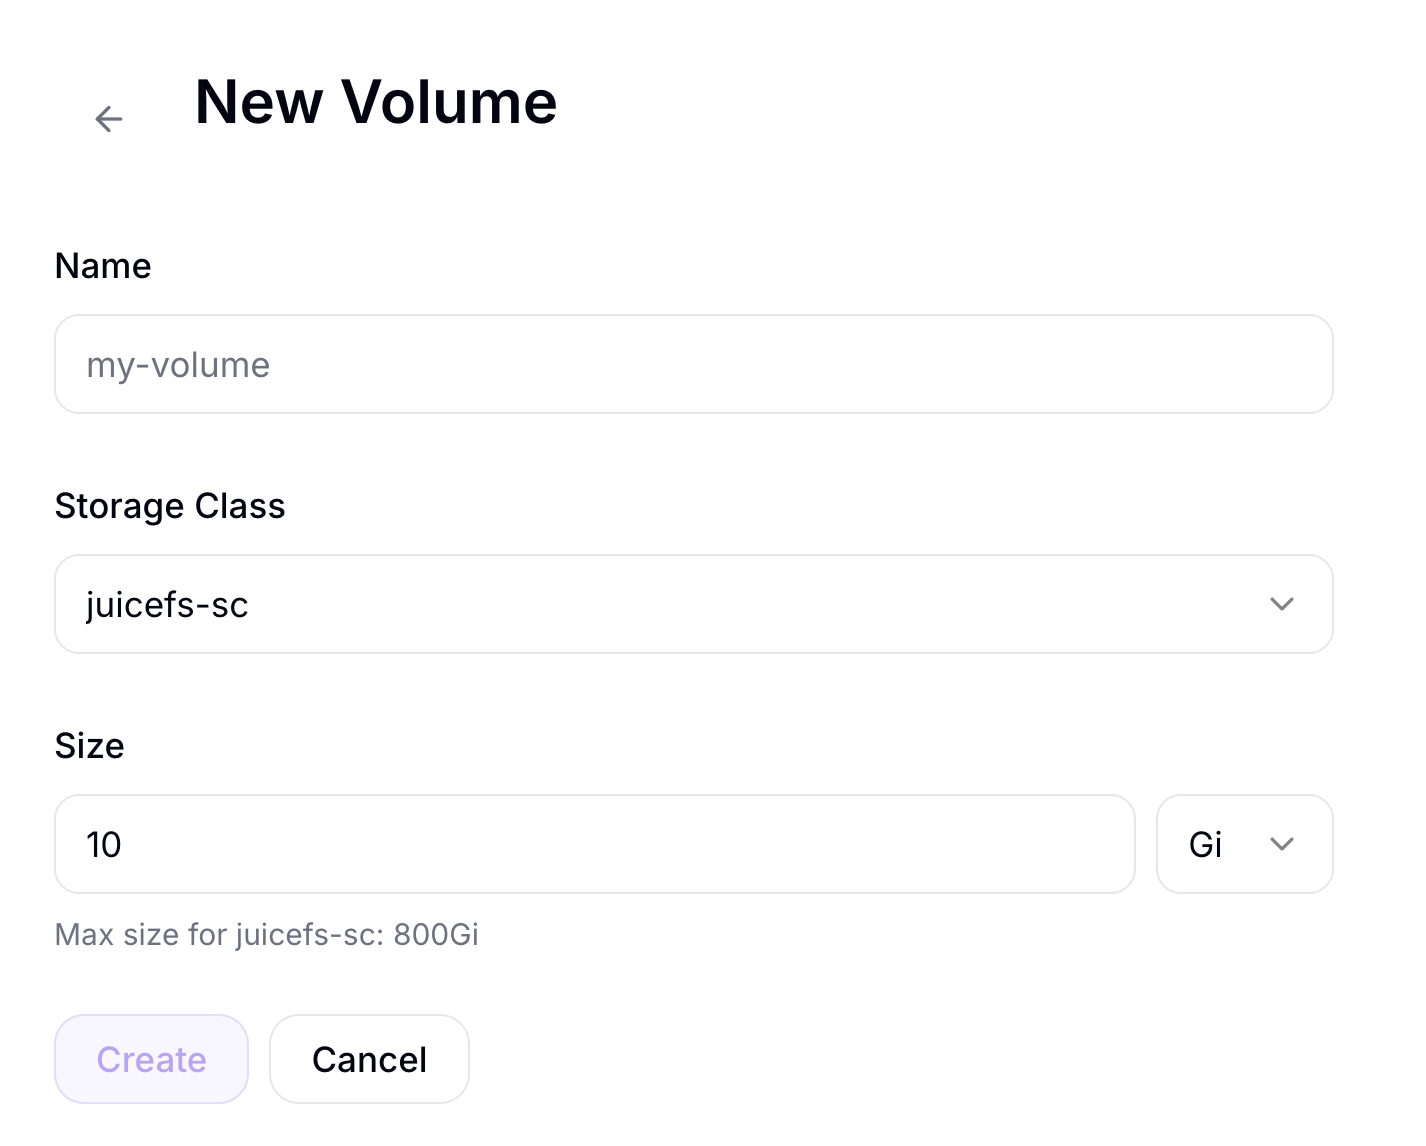
| Field | Description |
|---|---|
| Name | Volume name (lowercase, digits, hyphens / unique within the project) |
| Storage Class | Select one of the StorageClasses that already exists in the cluster. StorageClass resource creation and management are handled by the Kubernetes administrator or cluster operations tooling. |
| Size | Volume capacity (e.g., 10Gi) |
If the selected StorageClass defines a maximum size limit, the form shows a Max Size note and blocks create requests that exceed it.
- Click the Create button.
A Volume's size can be changed after creation. If a Volume's capacity becomes insufficient, use the resize feature on the Volume detail page.
Volume Detail Page
Click a row in the Volume list to navigate to the detail page.
- Overview
- Files
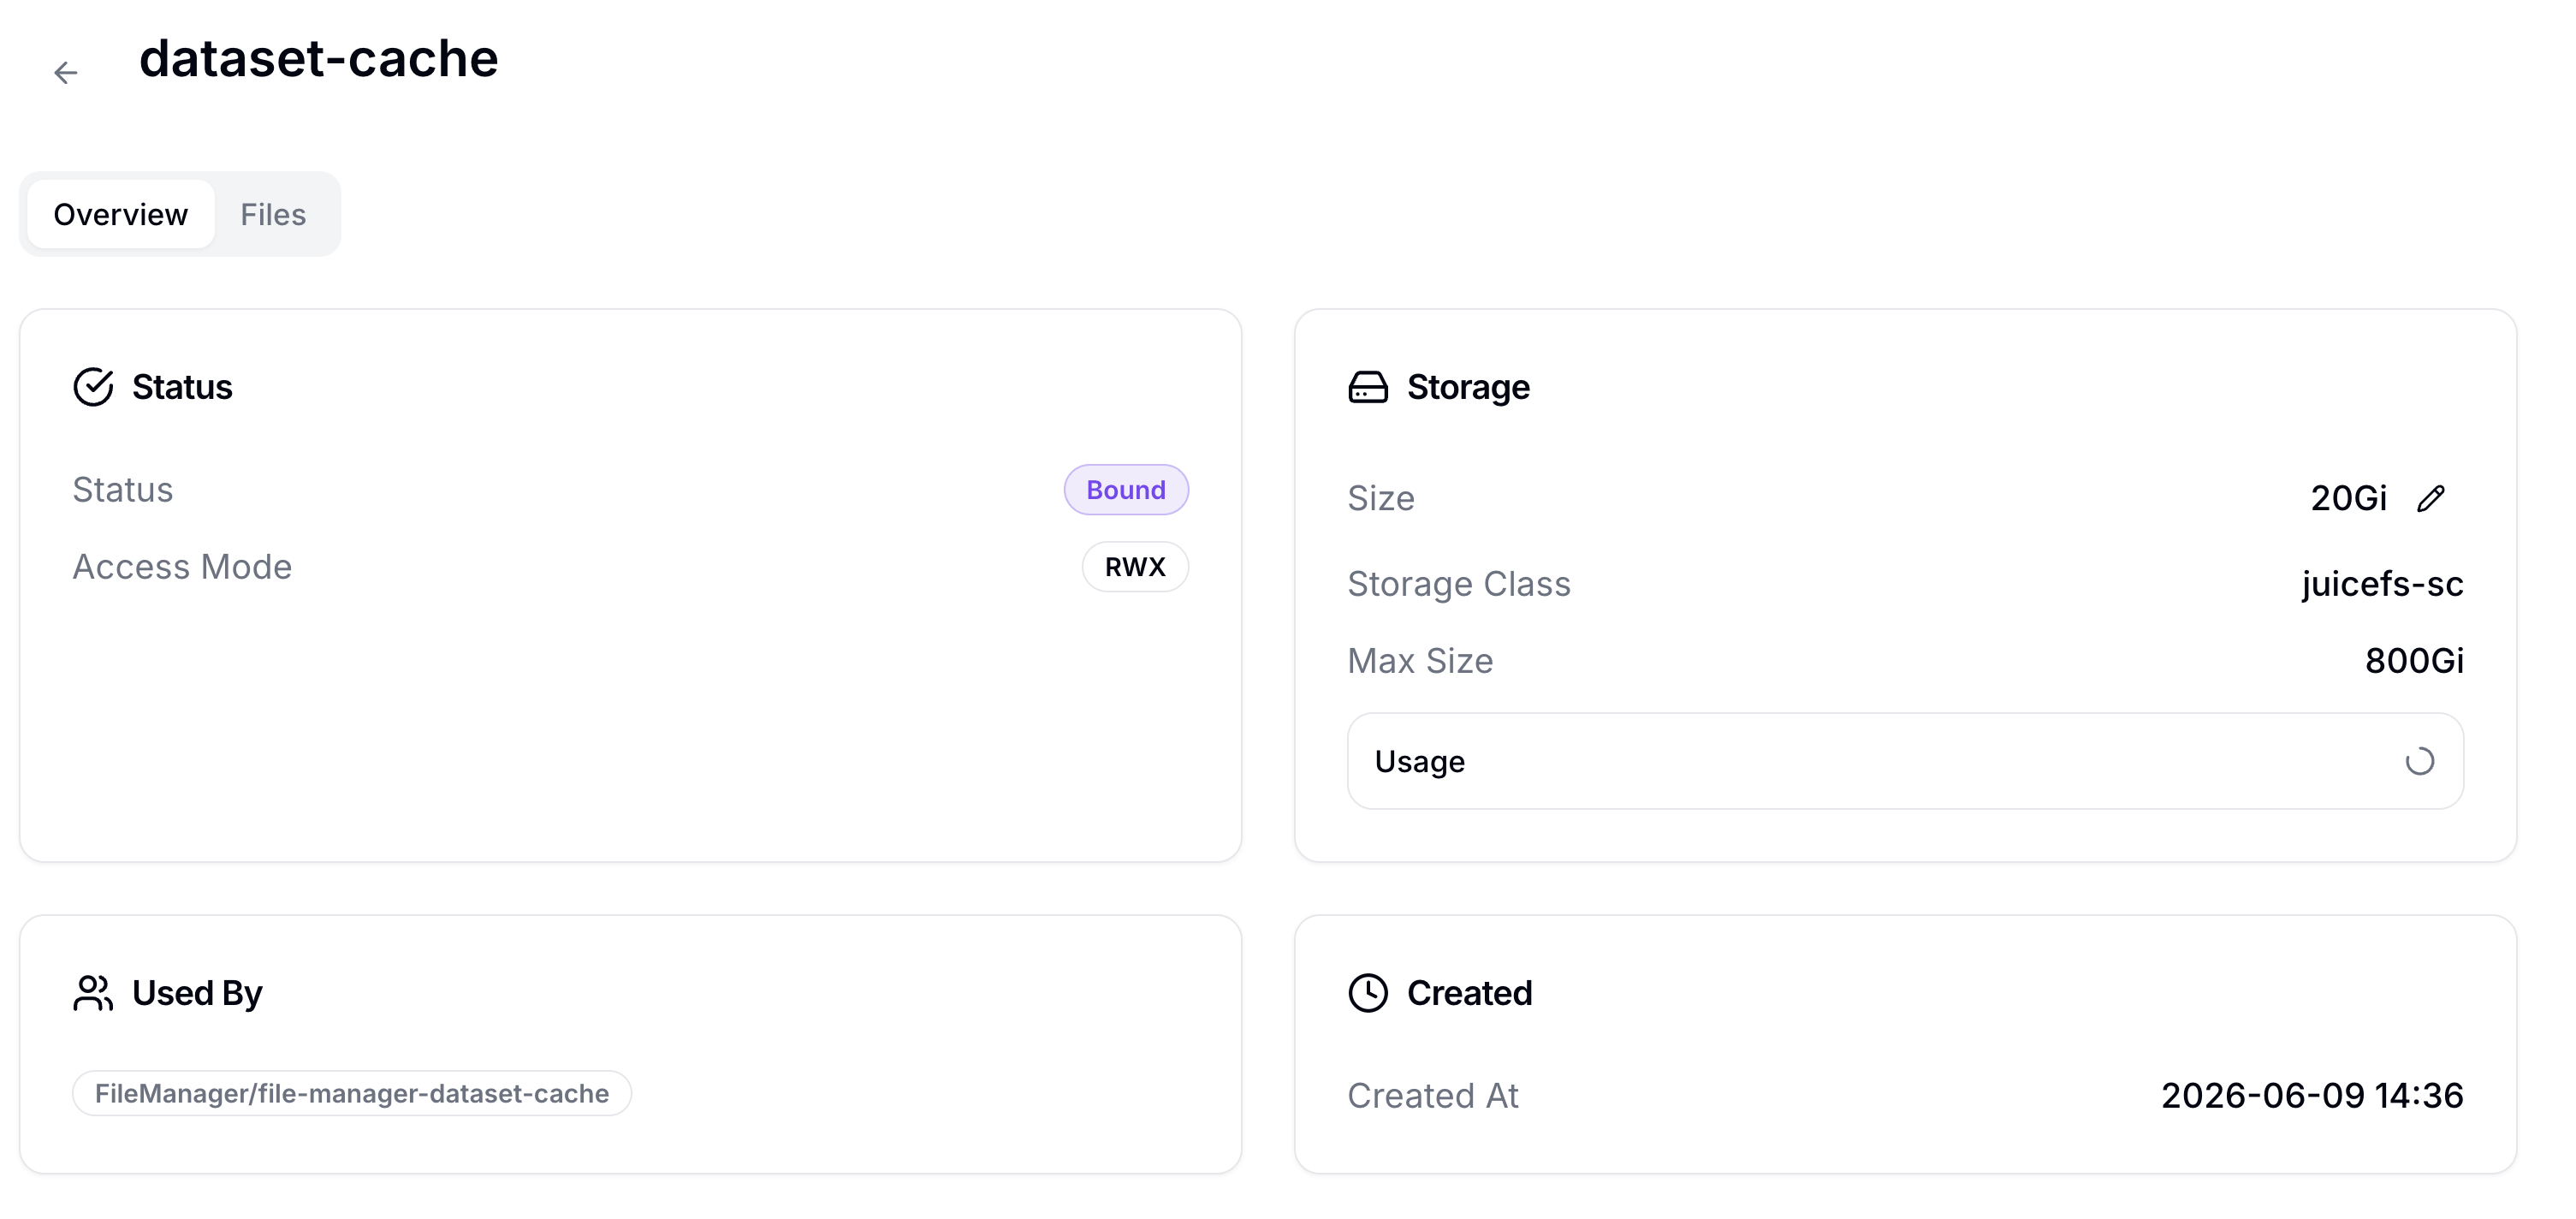
| Card | Information |
|---|---|
| Status | Status (PVC binding status), Access Mode |
| Storage | Size, Storage Class, Max Size, Usage |
| Used By | List of Labs / Servings currently mounting this Volume |
| Created | Creation time |
Max Size is the maximum Volume capacity allowed by the Storage Class. It is shown only when the Storage Class defines a maximum size limit, and Volume creation or resize requests cannot exceed this value.
Resize Volume
Click the edit (pencil) icon next to the Size item in the Storage card to increase the Volume capacity. This icon appears only when the Volume is in the Bound state.
To resize a Volume, follow these steps.
- In the Volume list, click a row for a Volume in the Bound state.
- In the Storage card on the Overview tab, click the edit icon next to the Size item.
- Enter the new size as a number and select a unit (Mi/Gi/Ti).
- Click the save (✓) icon to apply.
- Only values larger than the current size are accepted (shrinking is not supported). Entering a value equal to or smaller than the current size, or exceeding the StorageClass maximum capacity, shows an inline error message.
- Server/Kubernetes-level errors are delivered as toast messages.
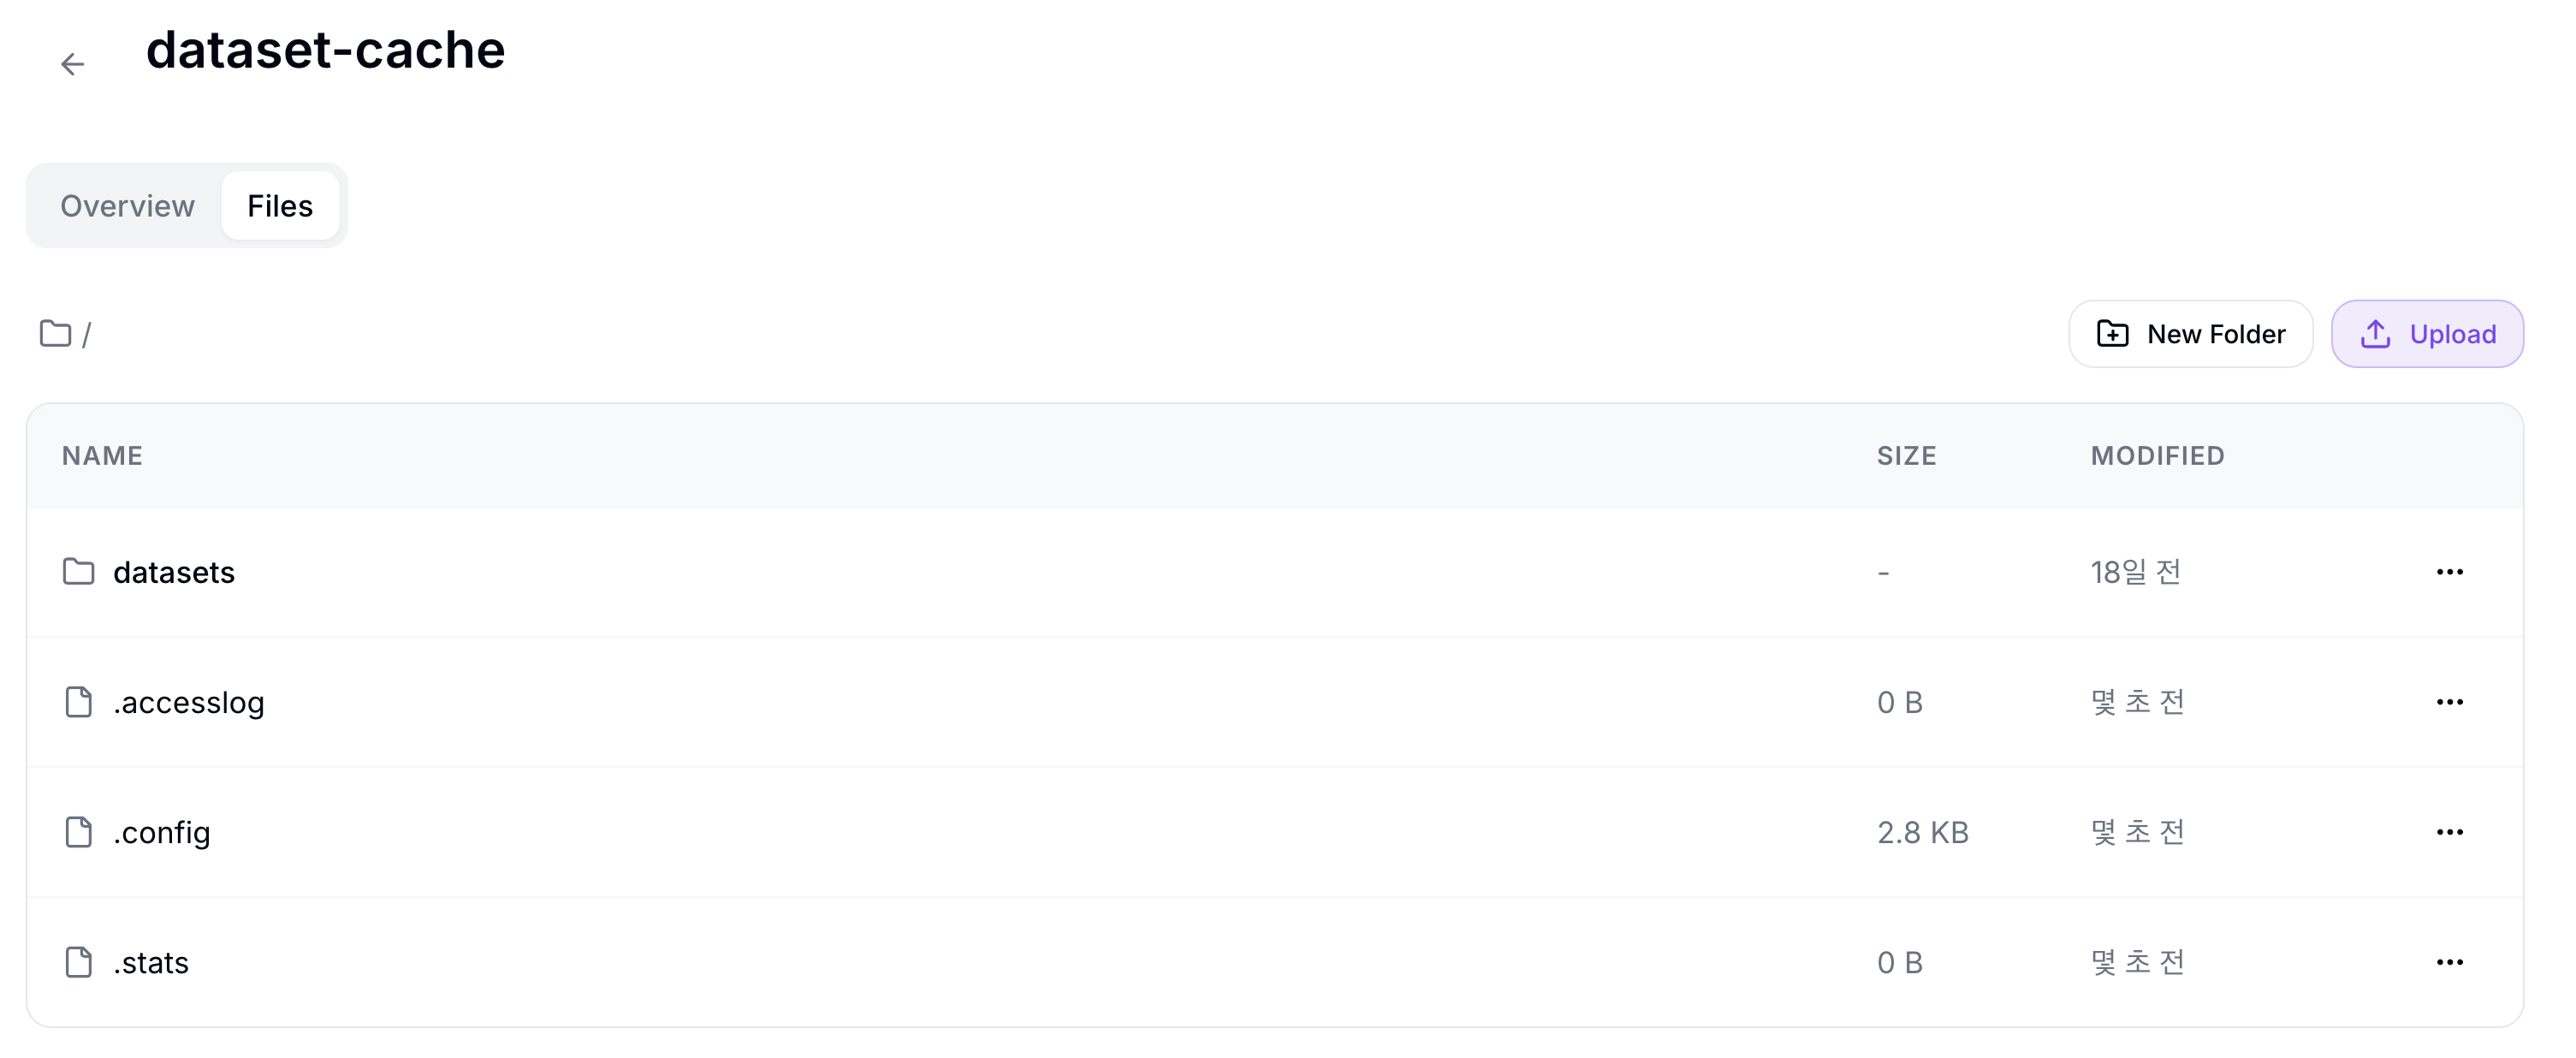
You can perform file management actions directly from the web UI — listing files, uploading, creating directories, moving and deleting files. This tab is disabled unless the Volume is in the Bound state.
| Button | Description |
|---|---|
| Upload | Upload local files to the Volume |
| New Folder | Create a new folder |
Click the ... button on the right side of a file or folder row to open the action menu for that item.
| Menu | Description |
|---|---|
| Download / Download (.zip) | Downloads a file as-is. Folders are compressed and downloaded as a zip file. |
| Rename | Renames the file or folder in the same location. |
| Move | Moves the file or folder to the selected directory. |
| Delete | Deletes the file or folder after confirmation. Deleting a folder also deletes its contents. |
Delete a Volume
In the Volume list, click the trash icon on the row of the Volume you want to delete, then confirm in the confirmation dialog.
A Volume currently mounted by a Lab or Serving cannot be deleted. First detach the Volume from those resources, then delete it.