Model Artifacts
Register models trained in MLflow into NuFi, manage per-version artifacts, and deploy them directly as inference services.
Models are managed as a 3-tier structure.
| Tier | Description |
|---|---|
| RegisteredModel | Top-level group, named by model |
| ModelVersion | An individual version of the model. Multiple versions can be registered under one model. |
| ModelArtifact | The actual file path linked to a version (Volume + Path). Includes the rngd artifact added automatically after NPU compilation. |
Prerequisites
- A NuFi project must already be created.
- The Volume (PVC) where the model files are stored must be mountable in the project.
- To use MLflow integration, you need an accessible MLflow Tracking Server.
Model List
In the left sidebar, click Models.
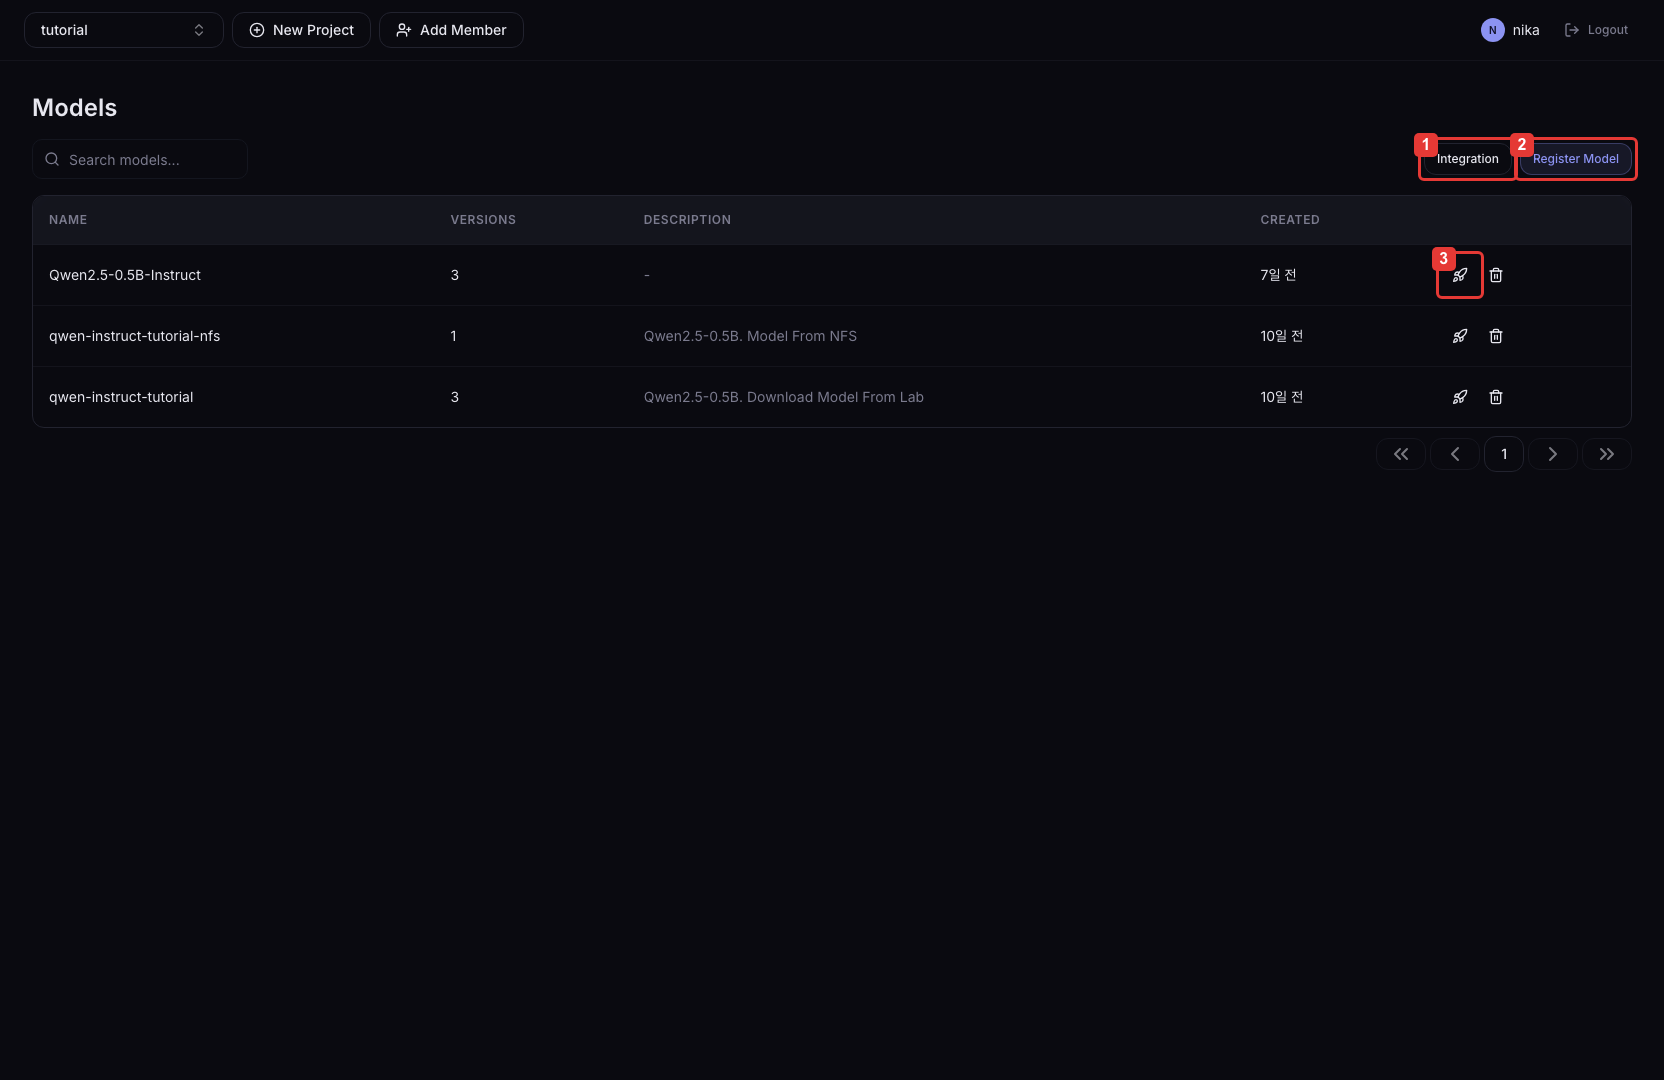
| Number | Description |
|---|---|
| ① | Go to the MLflow Webhook and Import History management page. |
| ② | Go to the form for manually registering a new model version. |
| ③ | Open the dialog to instantly deploy the selected model. Disabled for models with no versions. |
Columns
| Column | Description |
|---|---|
| Name | Registered model name |
| Versions | Number of registered versions |
| Description | Model description |
| Created | Time of first registration |
Model Detail — Version List
Click a model row in the model list to navigate to the version list page.
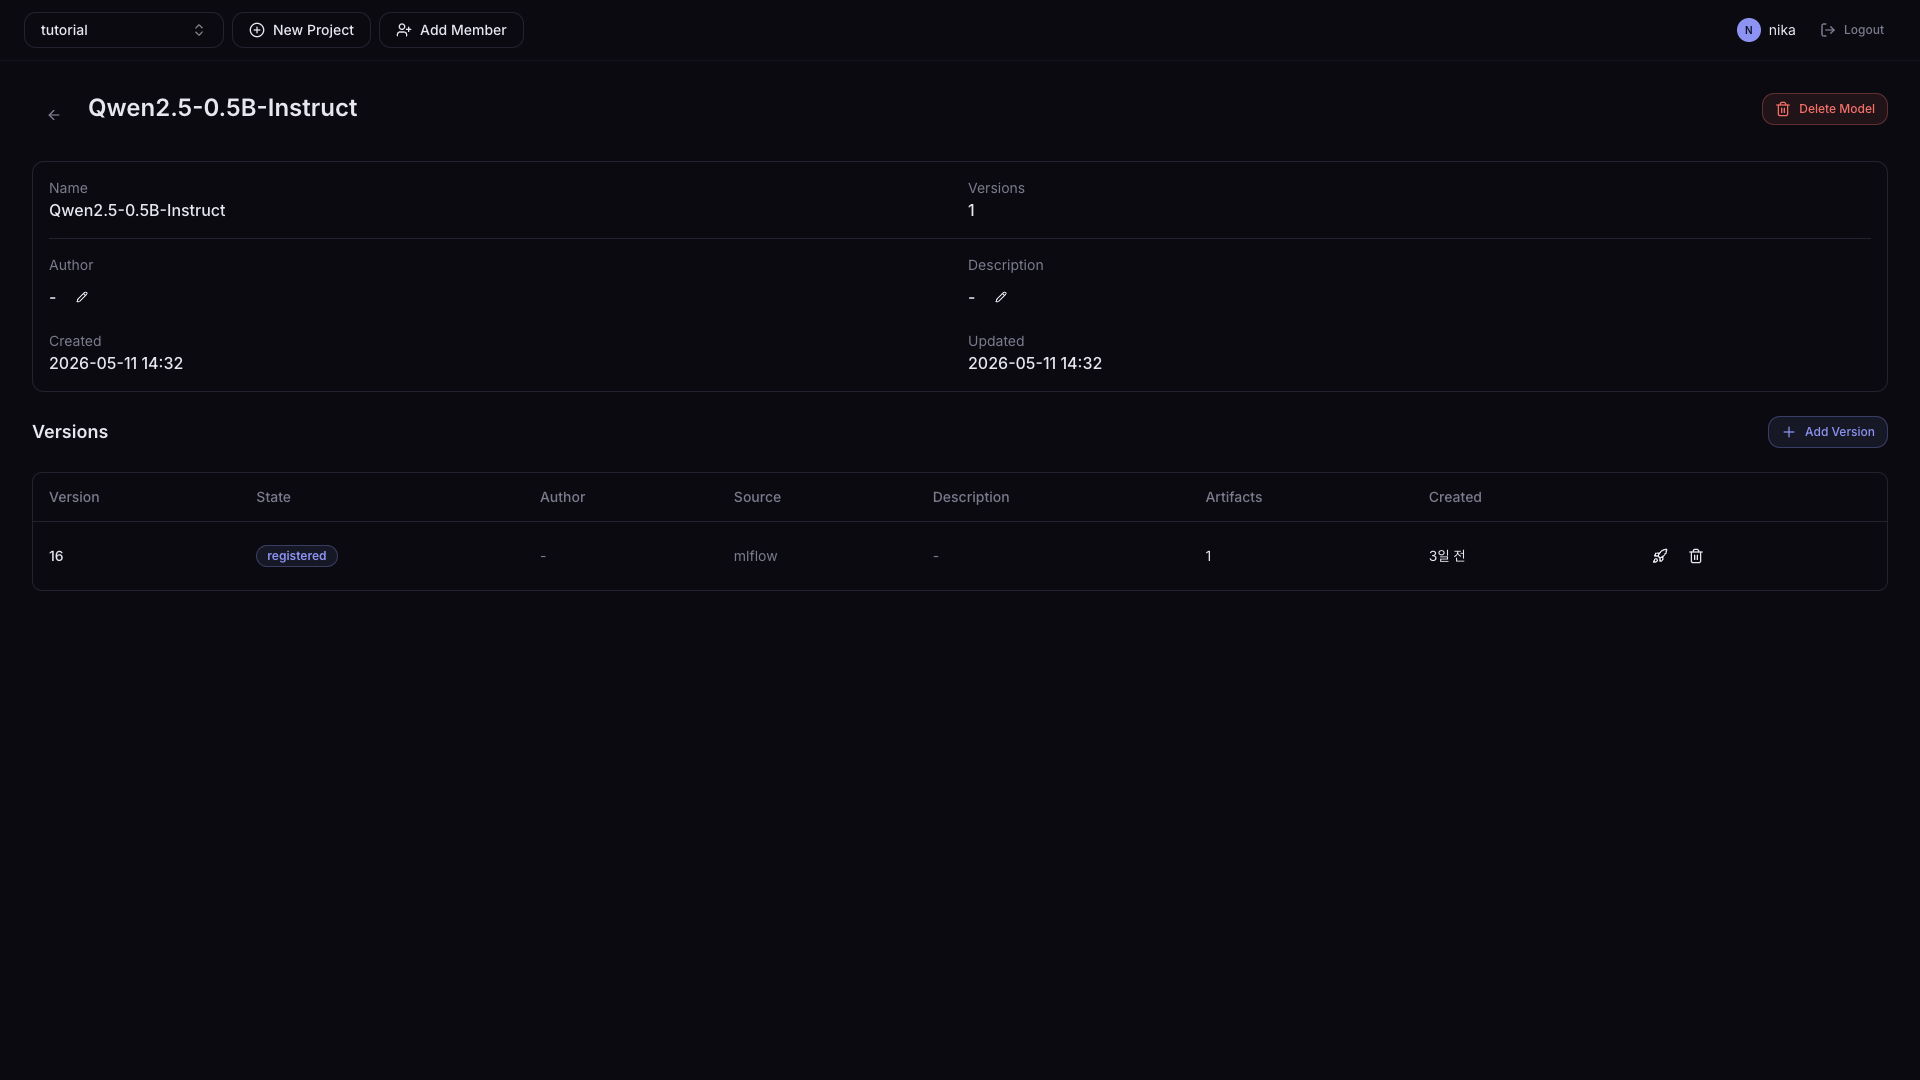
| Column | Description |
|---|---|
| Version | Version string (e.g., v1, 1.0.0) |
| State | Version state (Active, etc.) |
| Author | Name of the user who registered the version |
| Source | Source type of the version (e.g., mlflow, manual) |
| Artifacts | Number of artifacts linked to this version |
| Description | Version description |
| Created | Version registration time |
Click the + Add Version button at the top of the version list to add a new version to the current model.
Version Detail — Artifact List
Click a version row to navigate to the artifact list page.
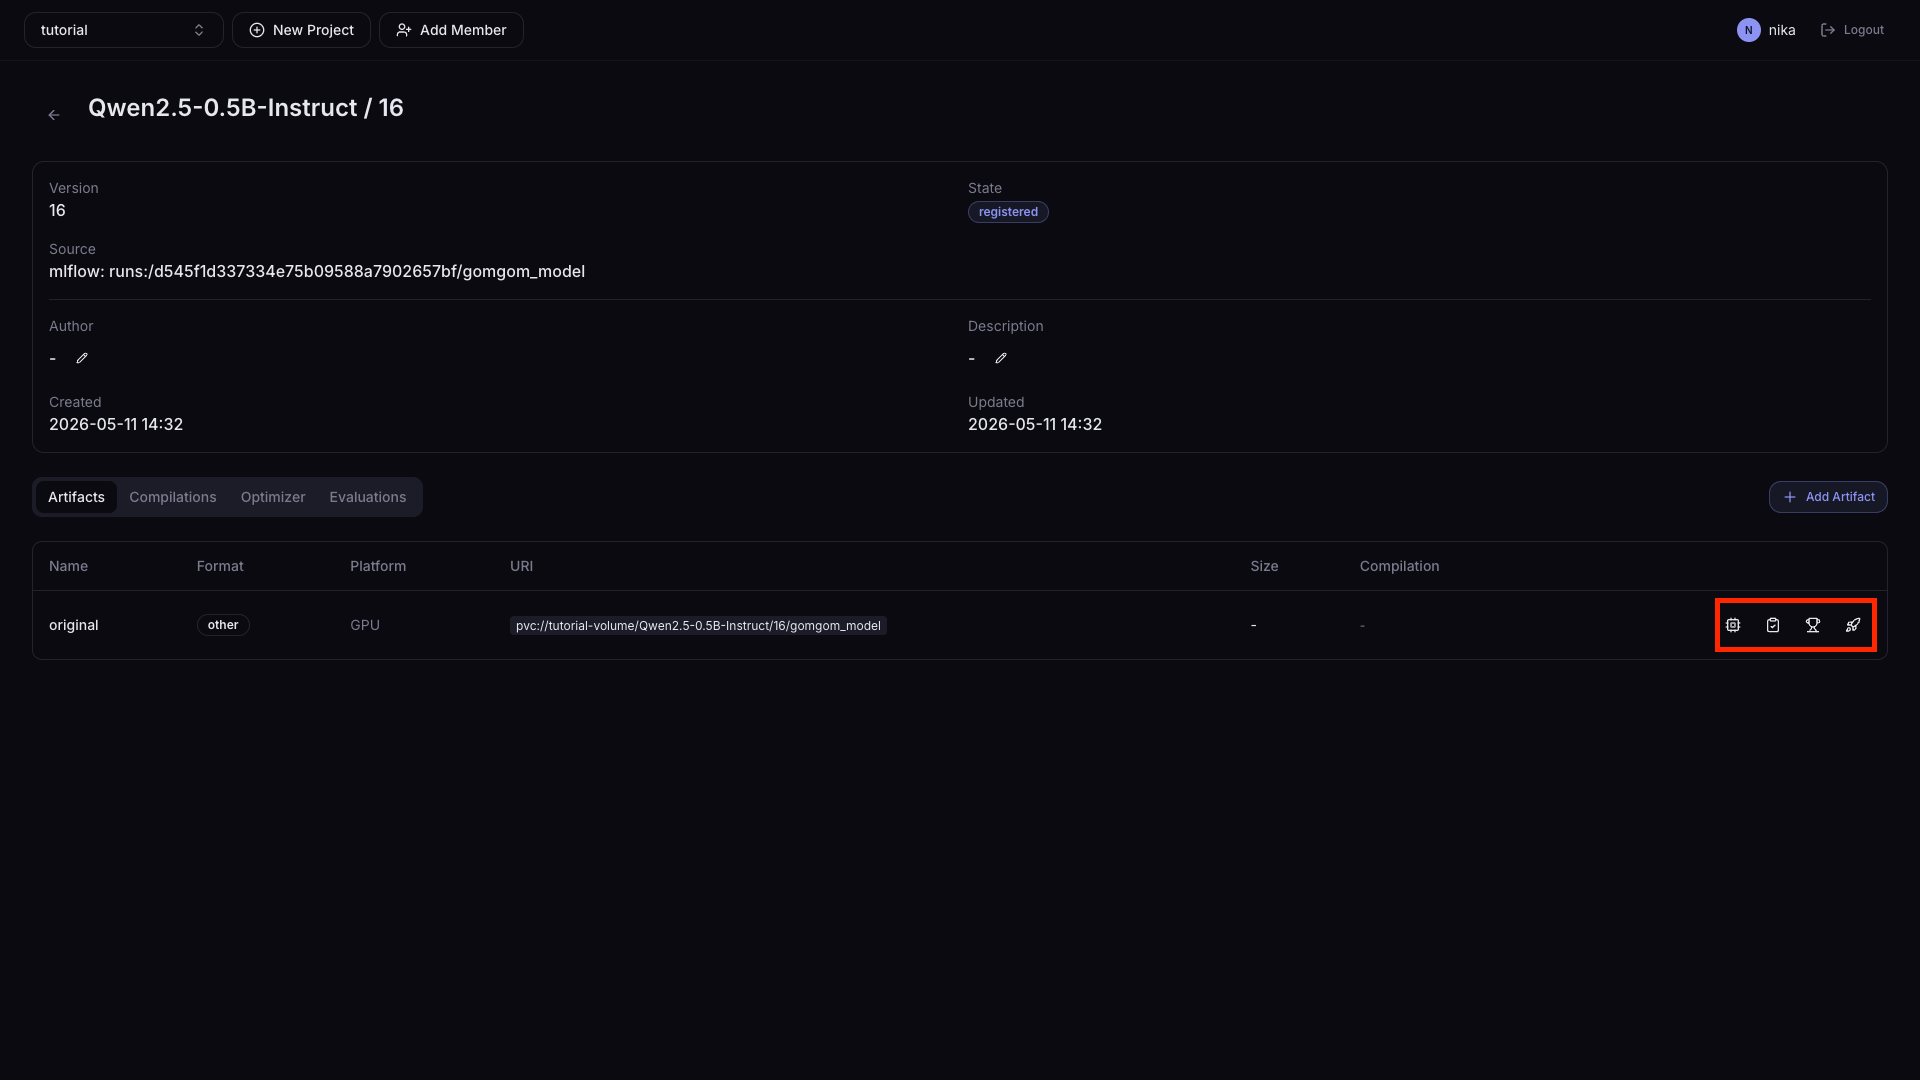
Columns
| Column | Description |
|---|---|
| Name | Artifact name (e.g., original) |
| Format | Model format (e.g., safetensors, gguf, rngd, other) |
| Platform | Target execution platform (rngd, gpu, etc.) |
| URI | Artifact file location (pvc://{volume}/{path} format) |
| Size | Artifact size |
| Compilation | Whether this is a compilation output / linked compilation info |
Action Icons
The four icons on the right of each row, from left to right:
| Icon | Action | Description |
|---|---|---|
| Compile | Quickly run an NPU compilation job for this artifact | |
| Evaluate | Run an evaluation job for this artifact (planned) | |
| Benchmark Submit | Submit the artifact to the official benchmark and compare results (planned) | |
| Quick Deploy | Open the dialog to instantly deploy this artifact |
Register a Model
A model is structured as model → version → artifact, and you register in that order.
1. Register the Model
Click the Register Model button in the upper right of the model list page.
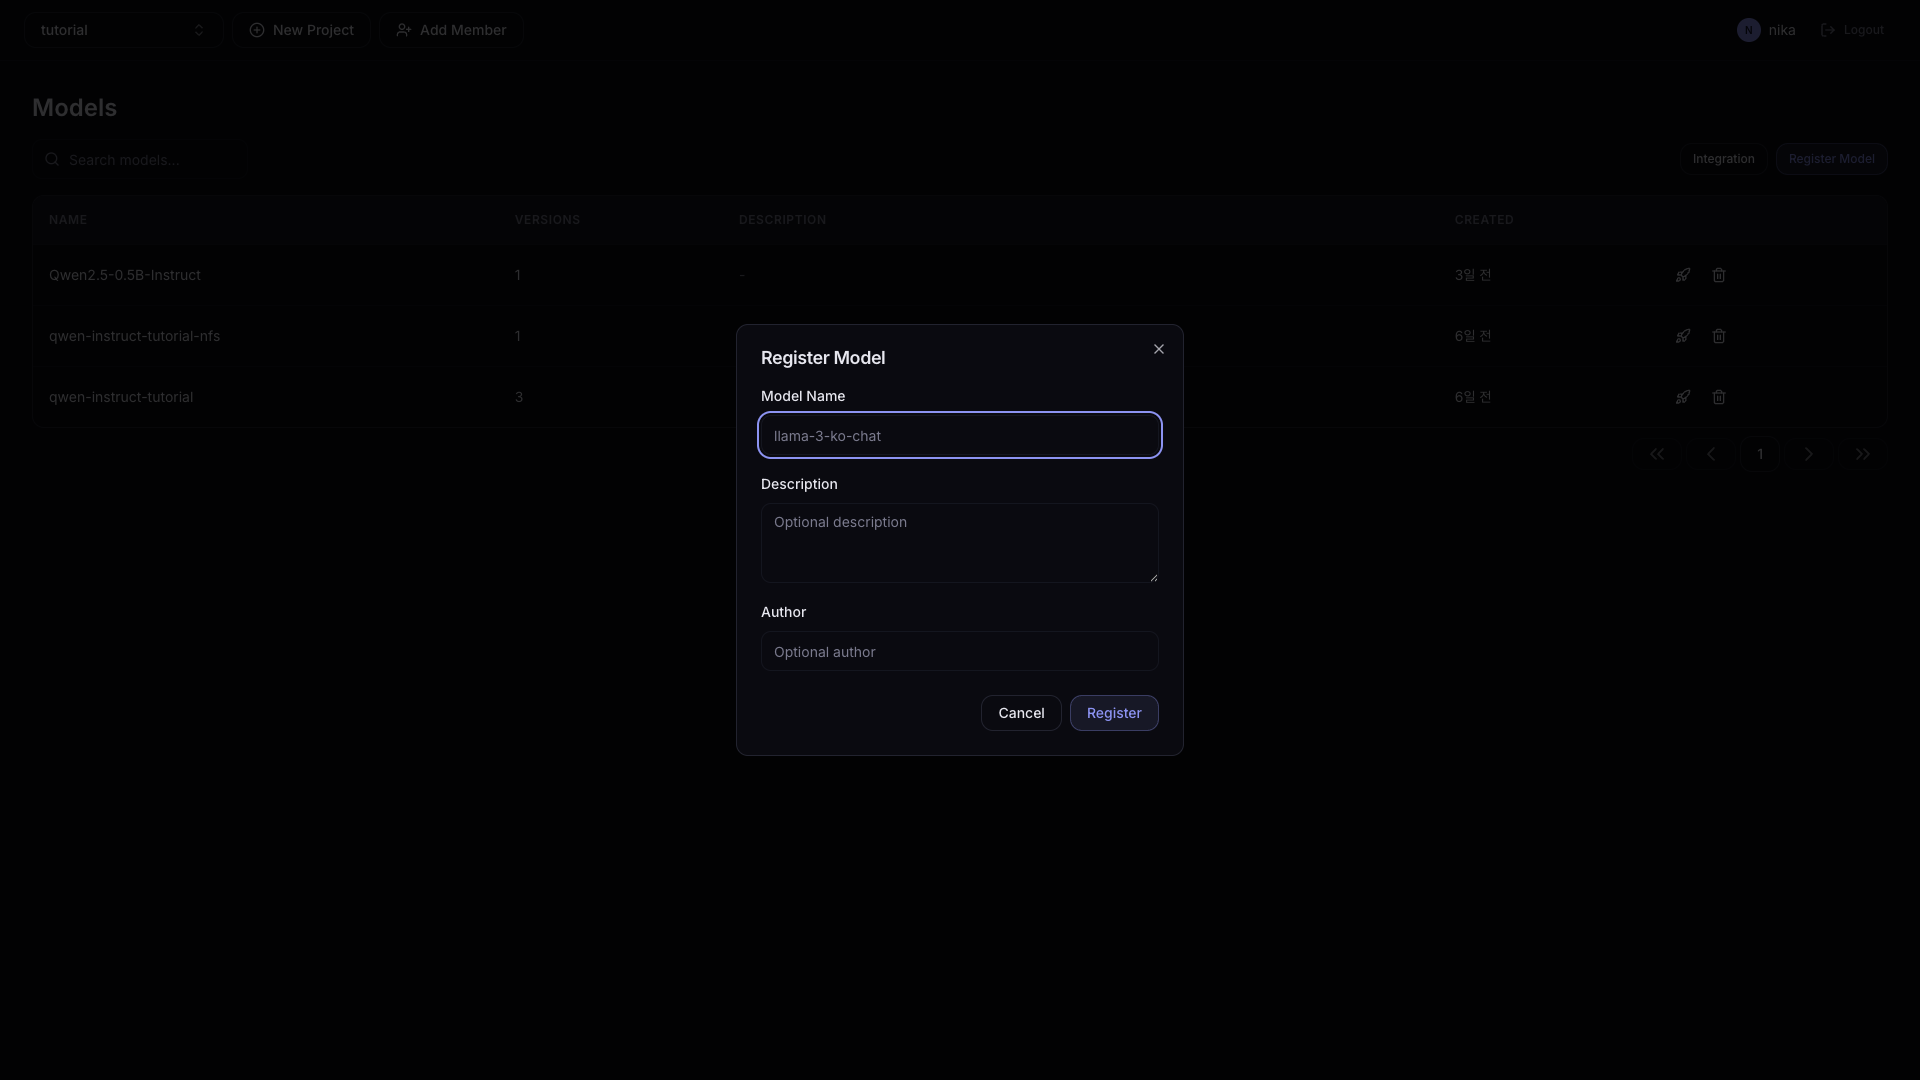
| Field | Description |
|---|---|
| Model Name | Model group name (e.g., llama-3-ko-chat) |
| Description | Description note for the model |
| Author | Name of the user registering the model |
2. Register a Version
In the model list, click the row of the registered model to go to the model detail page, then click the + Add Version button.
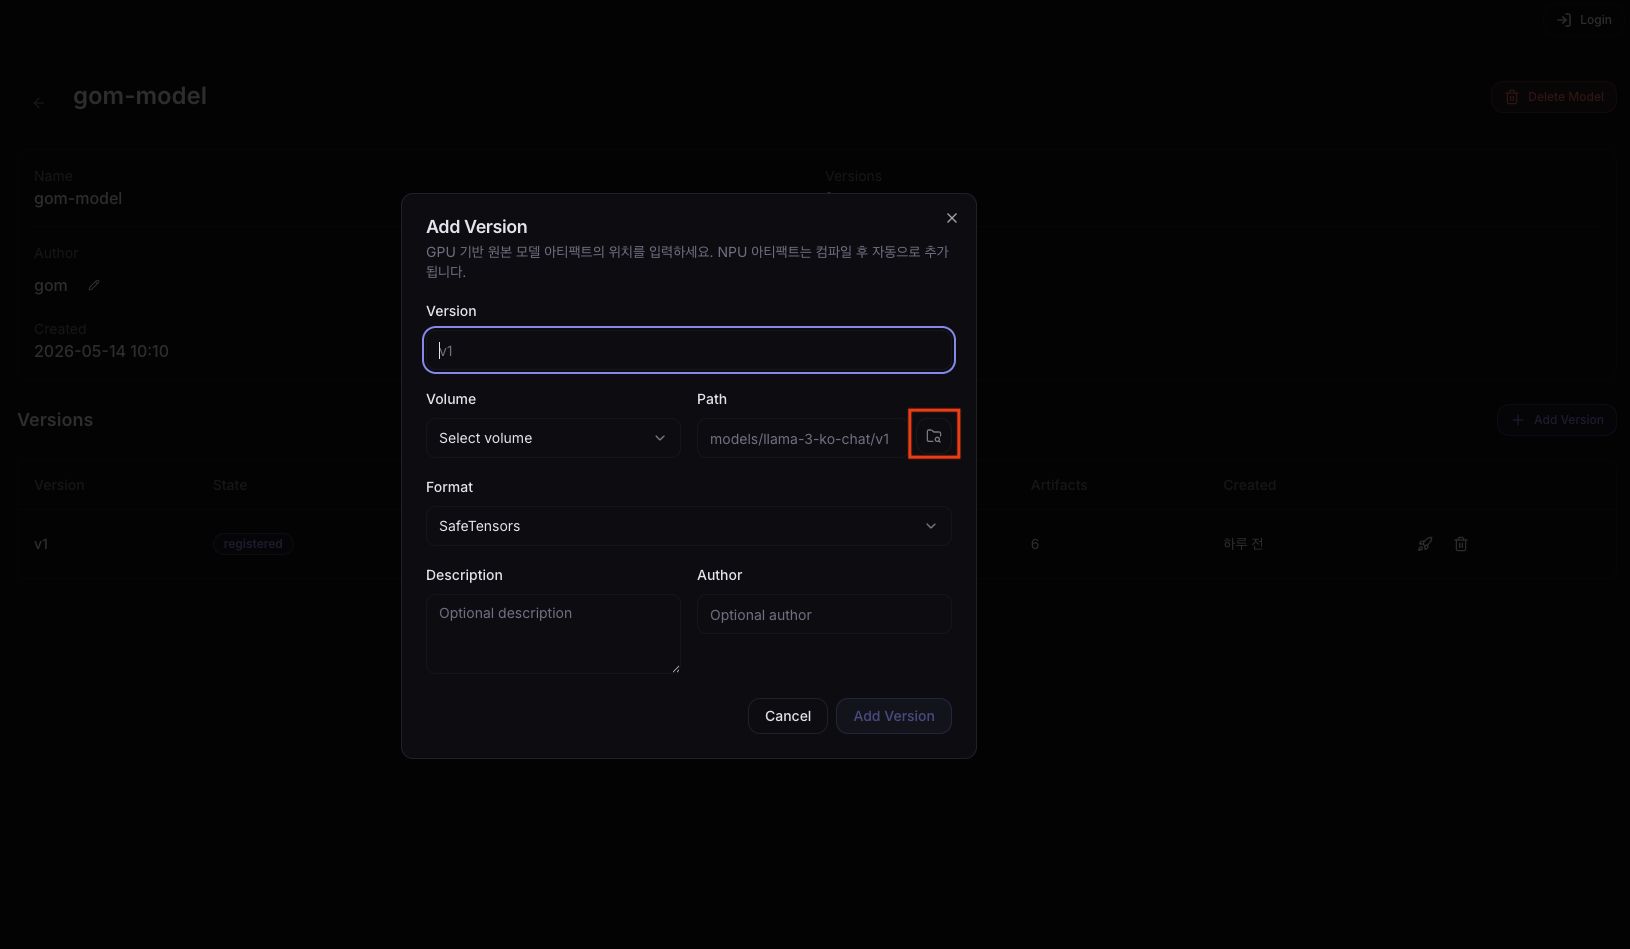
| Field | Description |
|---|---|
| Version | Version string (e.g., v1, 1.0.0). Must be unique within the same model. |
| Volume | Select the Volume (PVC) where the model files are stored. |
| Path | Path to the model file or directory inside the Volume. Click the folder icon to the right of the input to show a list of selectable models. |
| Format | Model file format. Auto-detection is attempted when Path is filled in. |
| Description | Description note for the version |
| Author | Name of the user registering the version |
3. Register an Artifact
In the version list, click the row of the registered version to go to the version detail page, then click the + Add Artifact button.
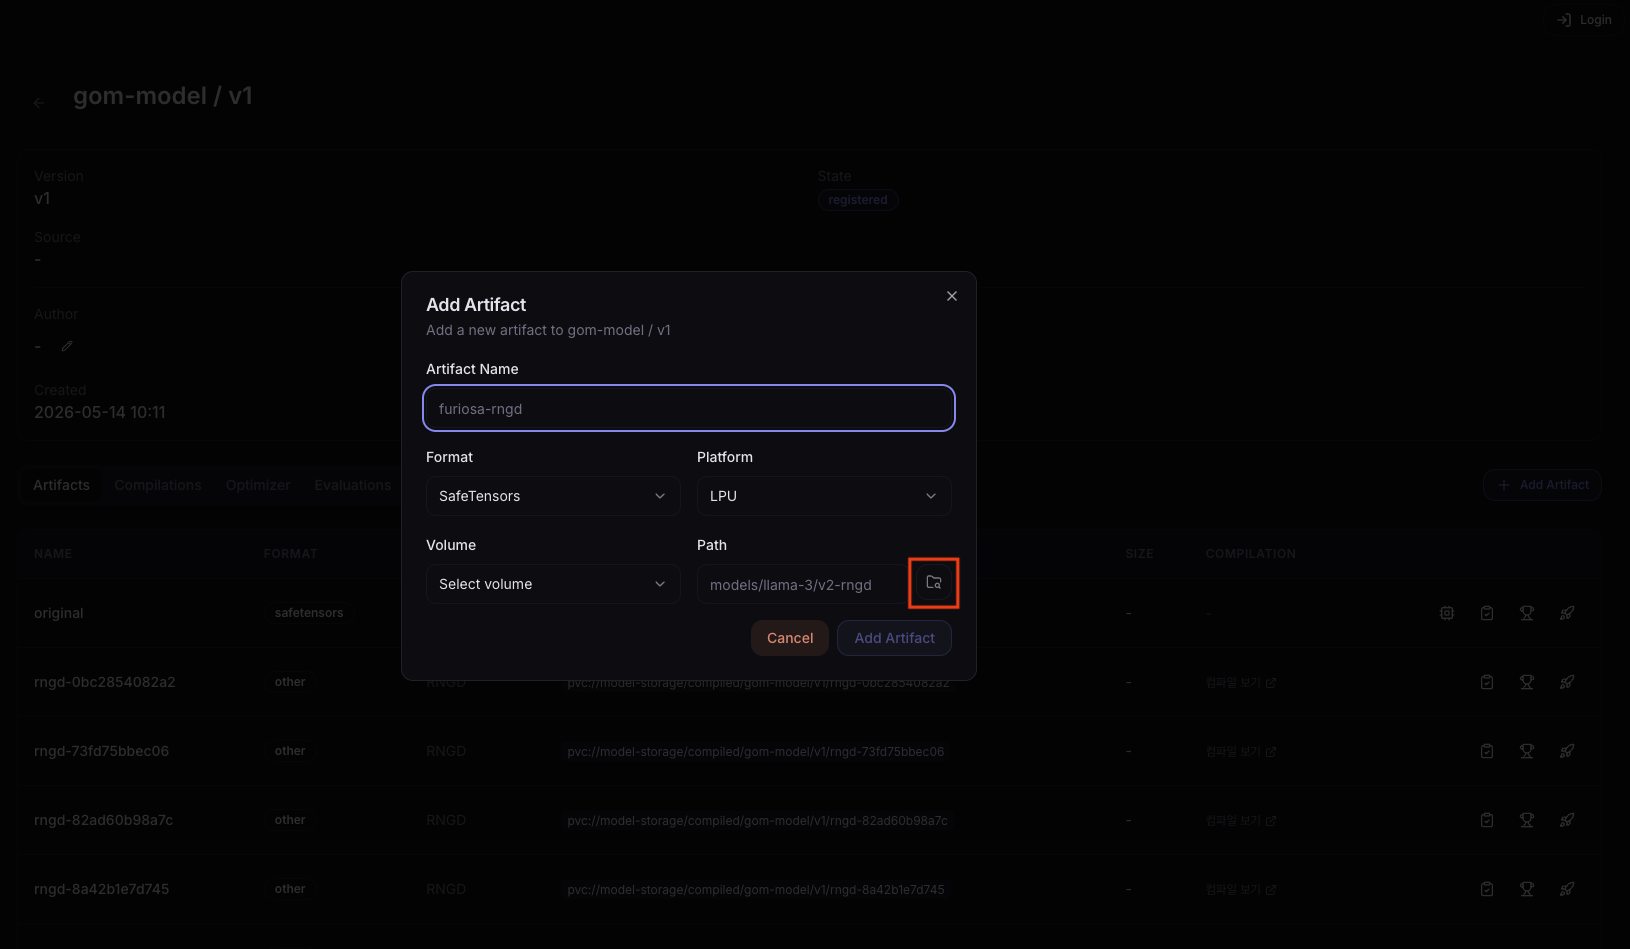
| Field | Description |
|---|---|
| Artifact Name | Artifact name (e.g., furiosa-rngd) |
| Format | Model format (e.g., safetensors, gguf, rngd) |
| Platform | Target execution platform (rngd, gpu, etc.) |
| Volume | Select the Volume (PVC) where the artifact file is stored. |
| Path | Path to the artifact file or directory inside the Volume. Click the folder icon to the right of the input to show a list of selectable models. |
Quick Deploy
From any of the model list, version list, or artifact list, you can click Quick Deploy (![]() ) to open the instant deployment dialog.
) to open the instant deployment dialog.
Per-Entry-Point Disable Conditions
| Entry Point | Disabled when |
|---|---|
| Model list | The model has no versions |
| Version list | The version has no artifacts |
Quick Deploy Dialog
The Quick Deploy dialog lets you select model/version/artifact through a Cascading dropdown, and based on platform, automatically picks the accelerator, inference engine, and container image.
| Field | Description |
|---|---|
| Model | Select the model to deploy |
| Version | Select the version to deploy (enabled after selecting a model) |
| Artifact | Select the artifact to deploy (enabled after selecting a version) |
| Service Name | Name of the Serving to be created |
| Inference Engine | Select the inference engine |
| Accelerator | Select the accelerator |
| Image | Container image |
Advanced section (optional):
| Field | Description |
|---|---|
| CPU | Container CPU request |
| Memory | Container memory request |
| Additional Arguments | Custom arguments to pass to the inference engine (e.g., --max-model-len 4096) |
| Environment Variables | Environment variables to inject into the container |
MLflow Integration
NuFi integrates with MLflow in two ways.
| Mode | Description |
|---|---|
| Pull (manual Import) | Pull artifacts directly from a specific Run on the MLflow Tracking Server. |
| Push (Webhook auto Import) | When a model is registered in MLflow, the event is delivered automatically to NuFi via a Webhook. Register the Receive URL provided by NuFi as a Webhook in MLflow. |
For the Webhook form fields, how to register the issued Receive URL in MLflow (with a MlflowClient.create_webhook example), and how to check Import History — see the step-by-step procedure in Tutorial: Model Registration — Method C: MLflow Integration.
Click the Integration button at the top of the model list to navigate to the integration management page.
Integration Page
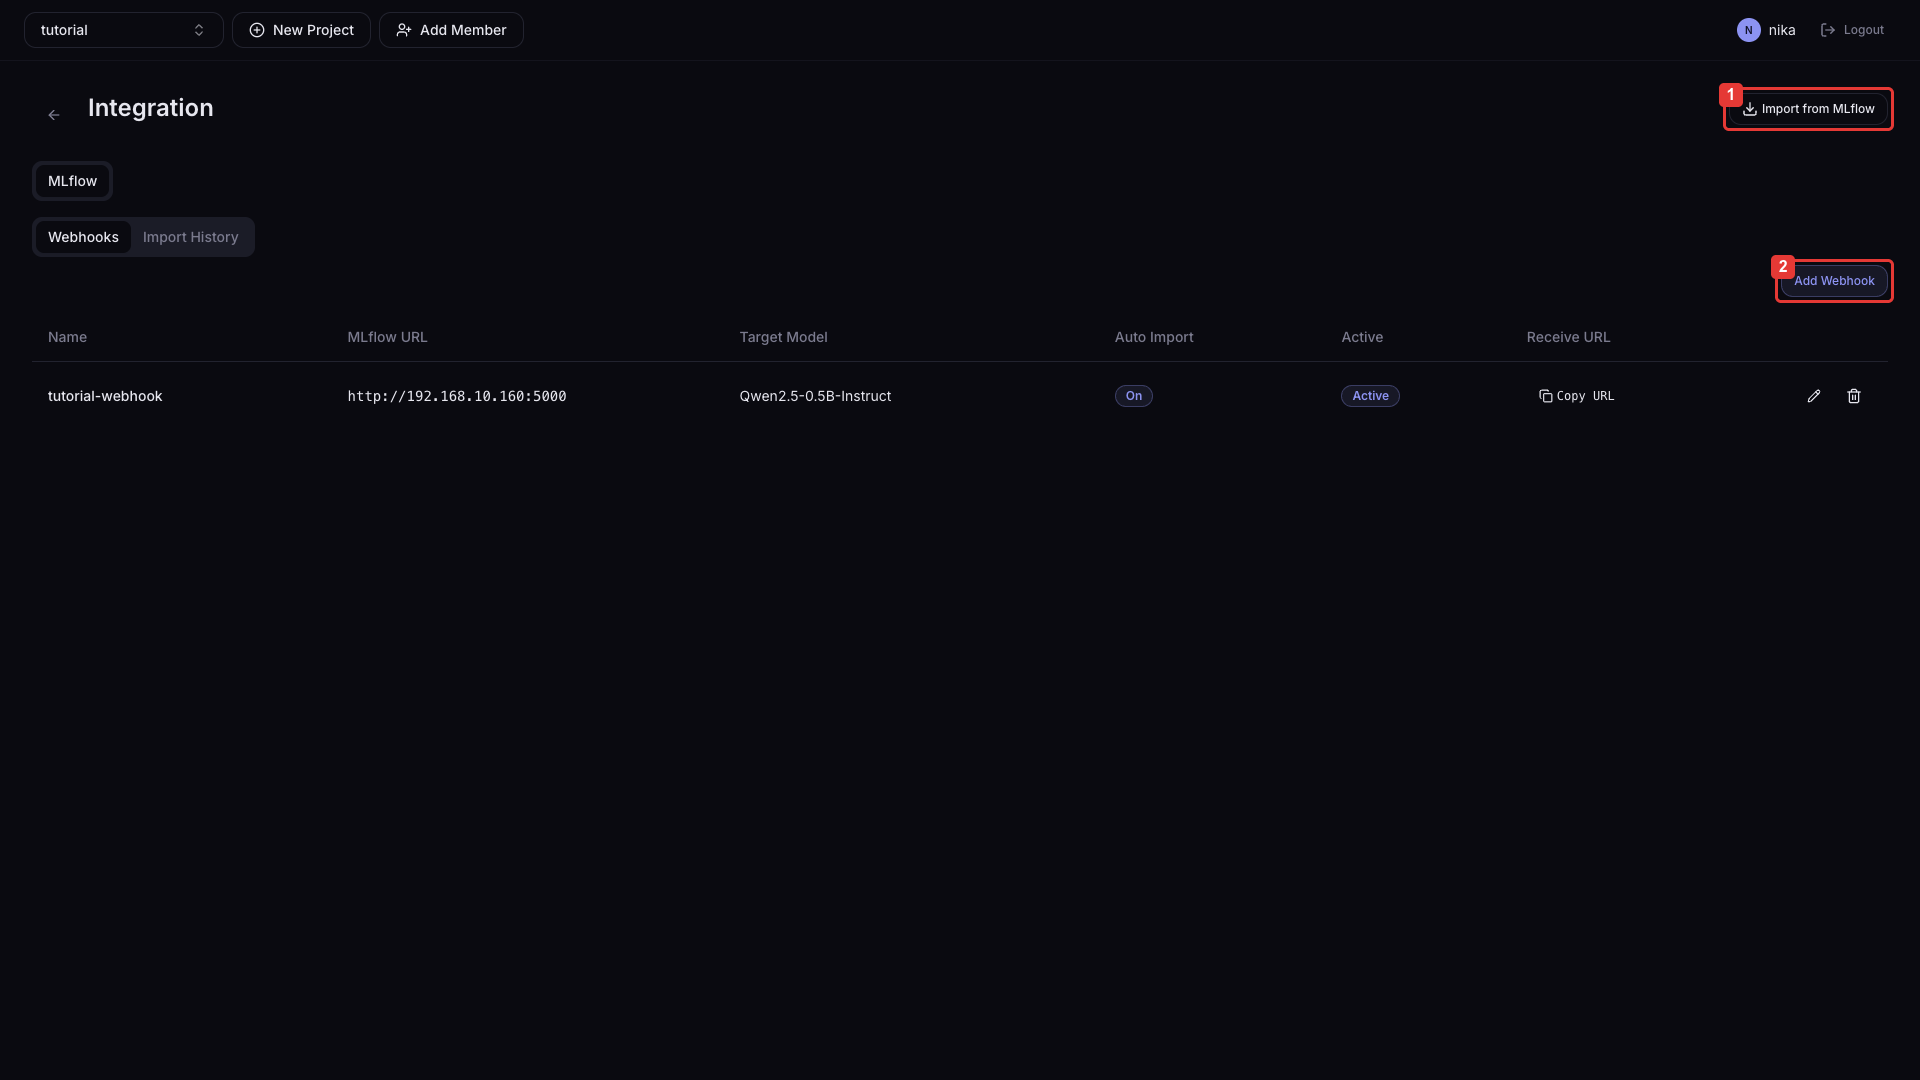
| Button | Description |
|---|---|
| ① Import from MLflow | Go to the Pull Import form |
| ② Add Webhook | Open the new Webhook registration dialog |
In the Webhook list tab, you can check the URL and status (Active/Inactive) of registered Webhooks, the most recent received events, and delete them.
How to register a Webhook:
- Click the Add Webhook button. NuFi's Receive URL is displayed.
- Copy the shown Receive URL and register it in MLflow's Webhooks settings.
- For how to register a Webhook in MLflow, see the MLflow Registry Webhooks documentation.
- From then on, whenever a model version is registered in MLflow, it is automatically delivered to NuFi.
In the Import History tab, you can query the status (Pending / Running / Succeeded / Failed) and logs of past Import jobs.
Handling abnormal states:
| Status | What to check |
|---|---|
| Import Failed | Re-verify that the MLflow Tracking URL and Run ID are correct. |
| Webhook Inactive | Check that the URL entered when registering the Webhook is reachable from MLflow. |
Pull Import Form
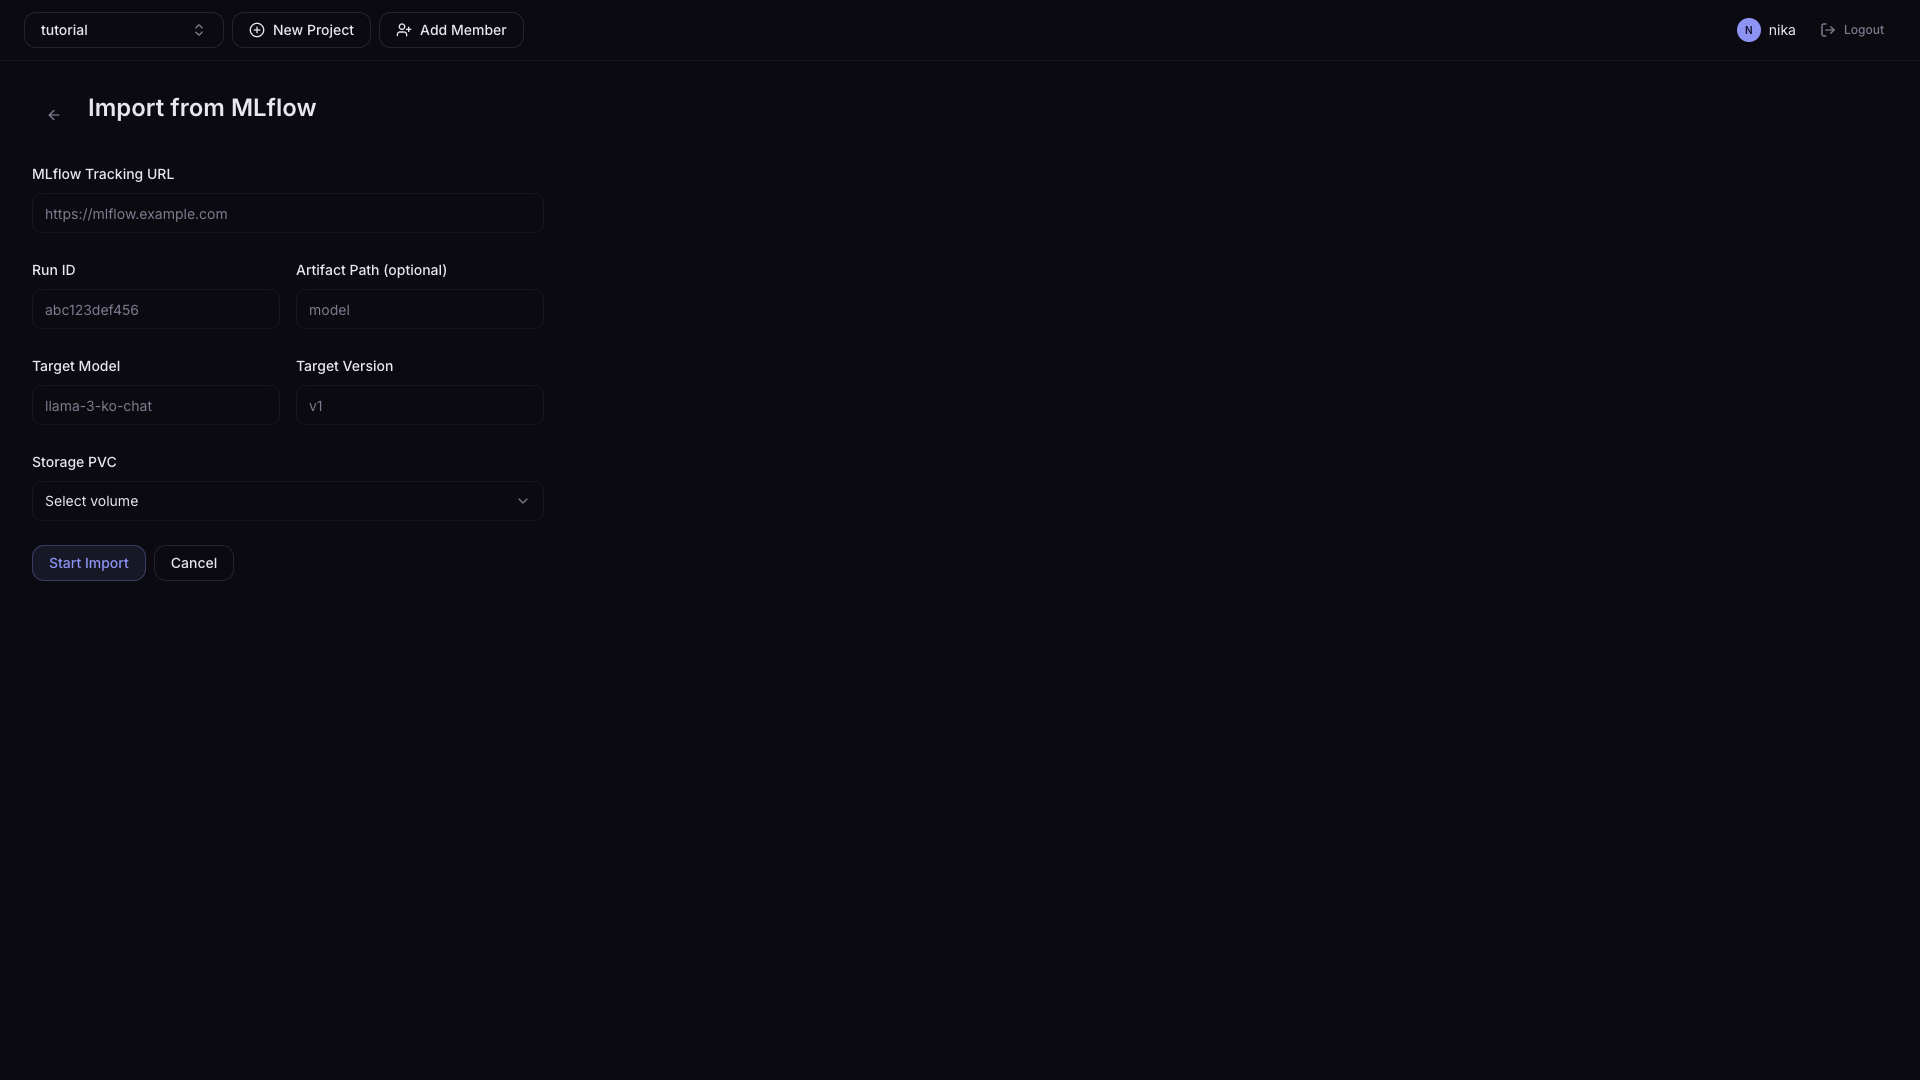
| Field | Description | Required |
|---|---|---|
| MLflow Tracking URL | MLflow Tracking Server address (e.g., http://mlflow.example.com) | ✓ |
| Run ID | UUID of the MLflow Run to import | ✓ |
| Artifact Path (optional) | Path to a specific artifact inside the Run. If empty, the entire Run is pulled. | - |
| Target Model | The model name to be registered in NuFi | ✓ |
| Target Version | The version string to be registered in NuFi | ✓ |
| Storage PVC | Select the Volume (PVC) to store the artifacts | ✓ |
When you click the Import button, a background Import job starts. You can check progress under Integration > Import History.