Register Model
Register model files stored on a Volume to NuFi so they can be used in compile, evaluate, and serving.
Method A: Register a Directly Downloaded Model
Register a model downloaded onto a Volume from 03. Download Model.
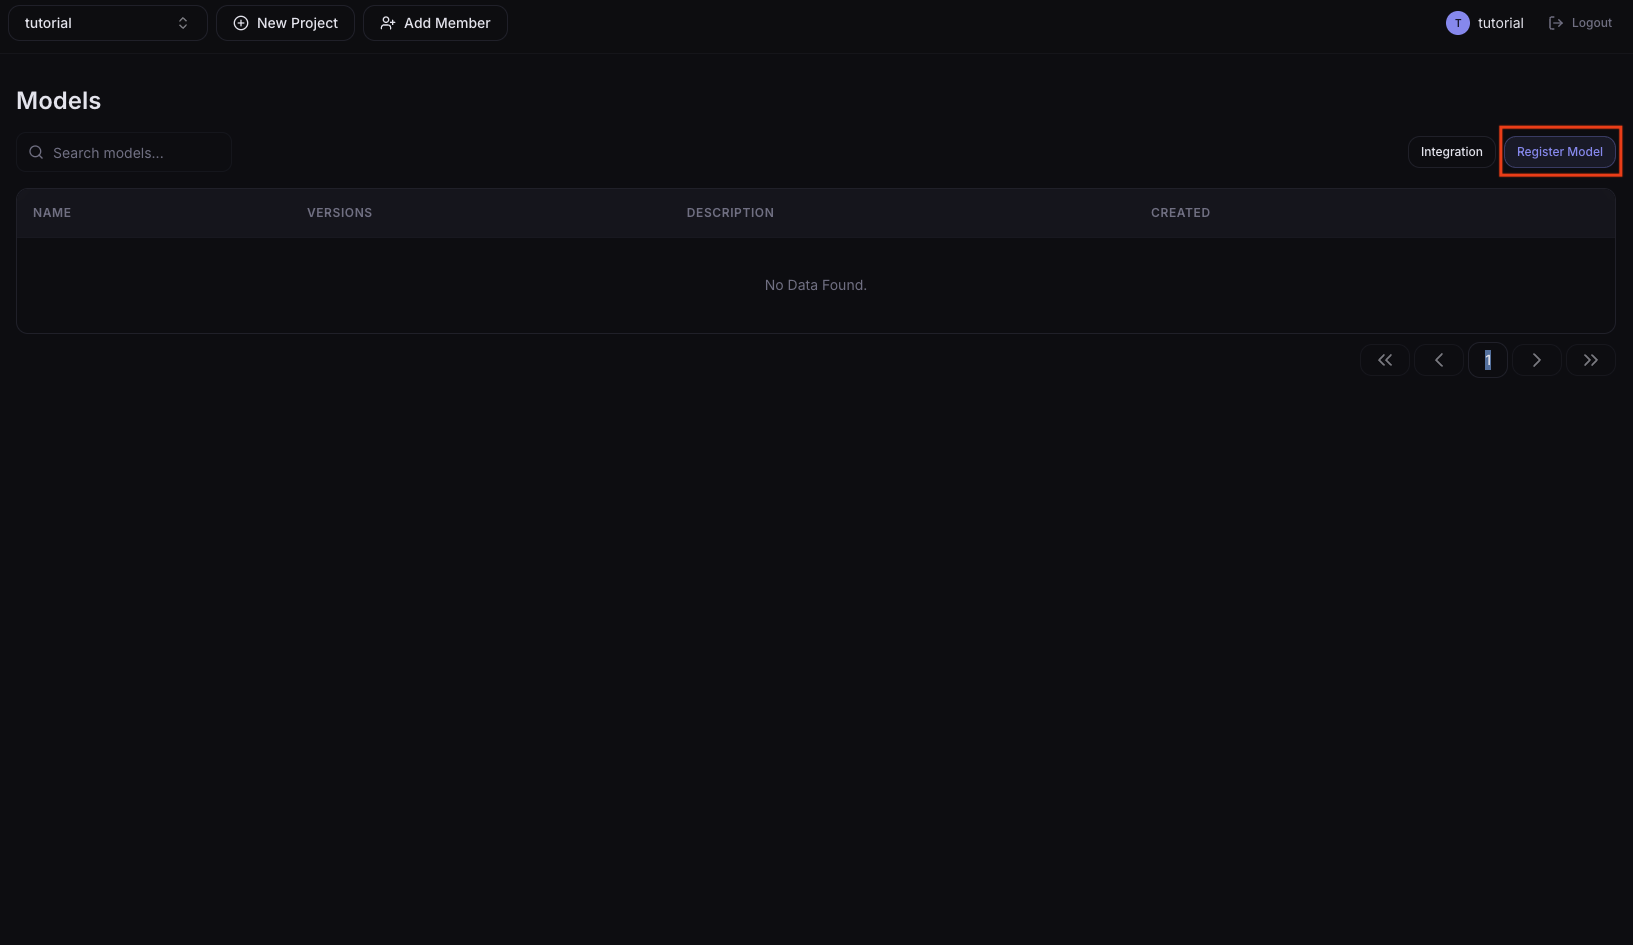
1. Go to the model registration menu
In the left sidebar, click Resources > Models and press the Register Model button.
2. Enter the model information
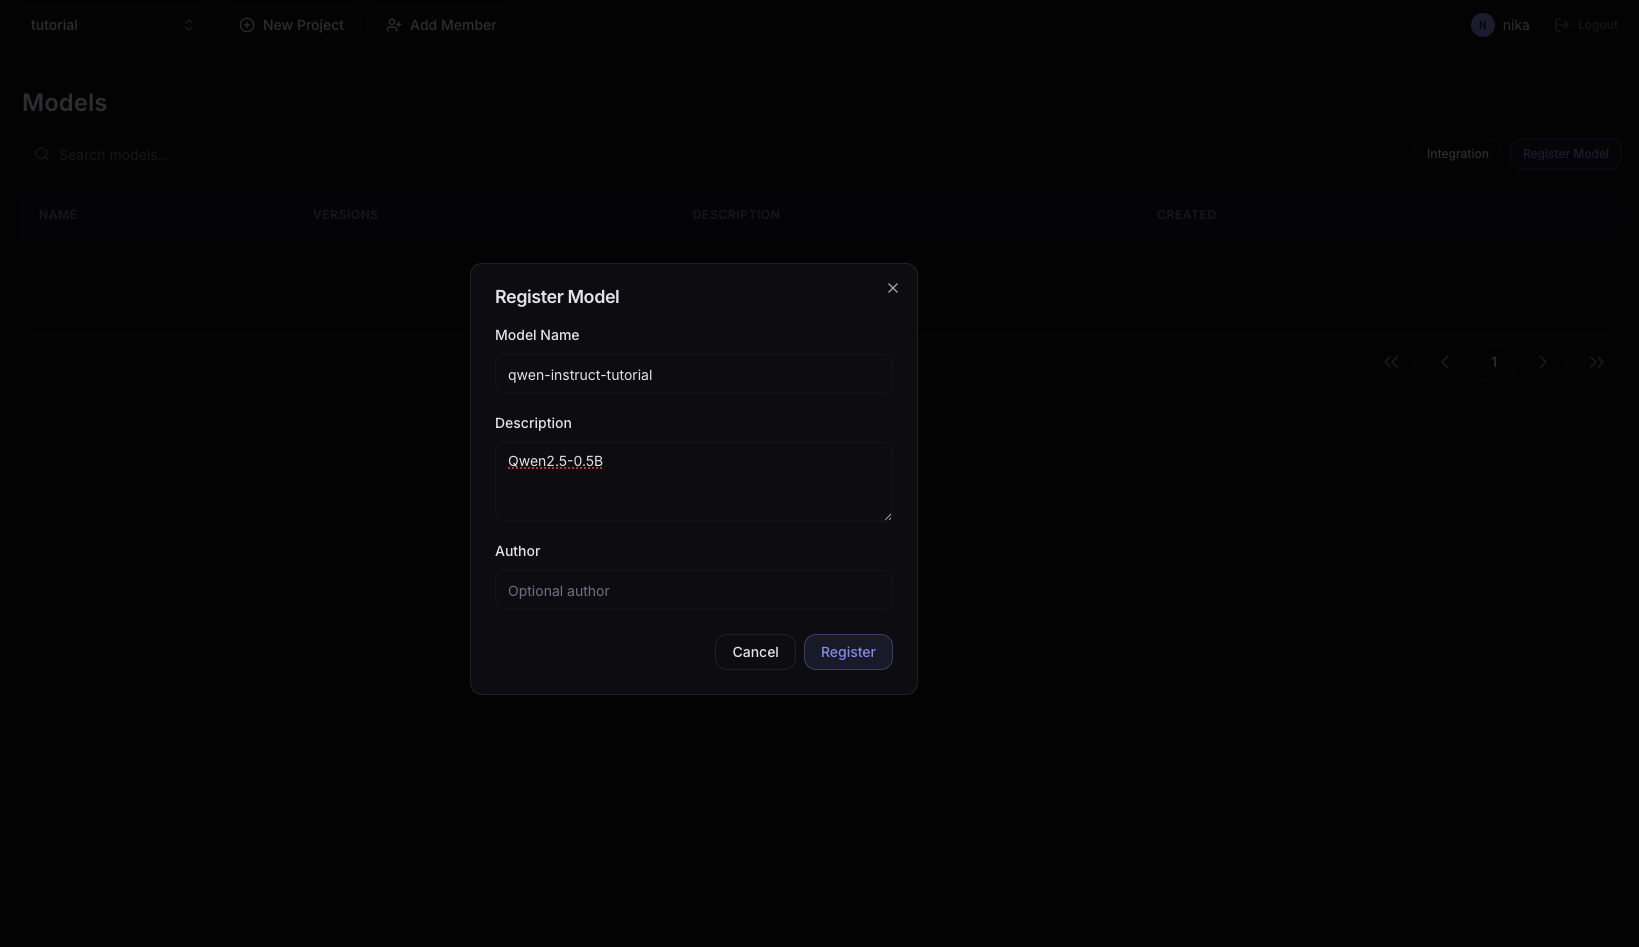
| Field | Example value | Description |
|---|---|---|
| Model Name | qwen-instruct-tutorial | Model identifier name |
| Description | - | Model description (optional) |
| Author | - | Author (optional) |
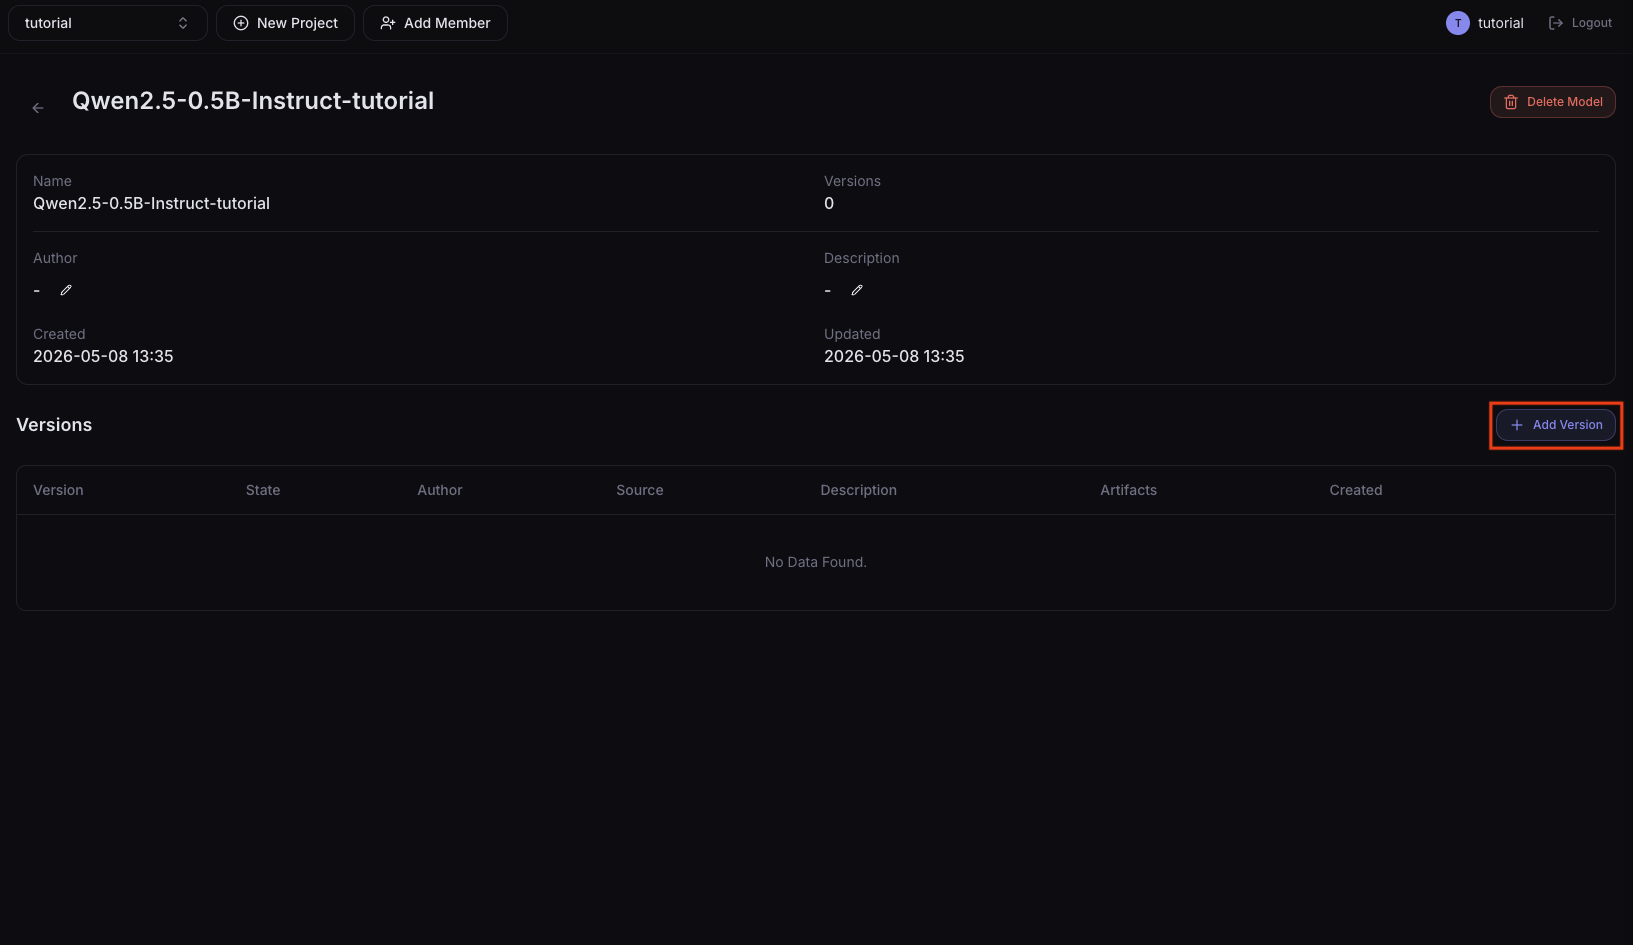
3. Add an artifact
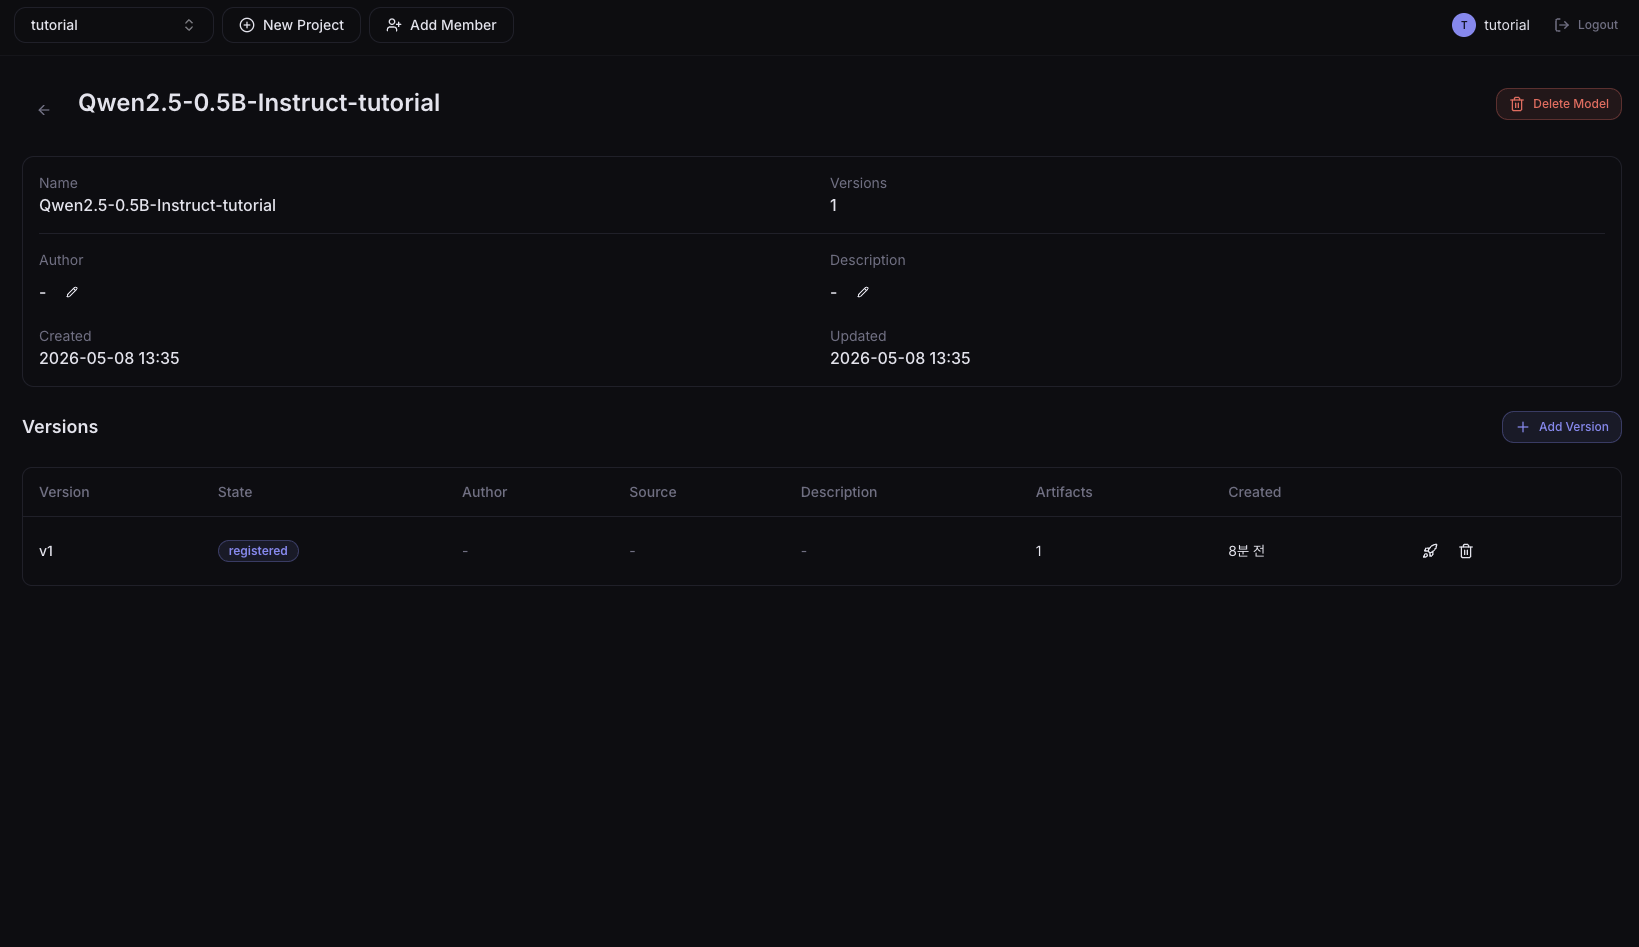
After registering the model, click it in the list to go to the detail screen. Click the Add Version button to add an artifact.
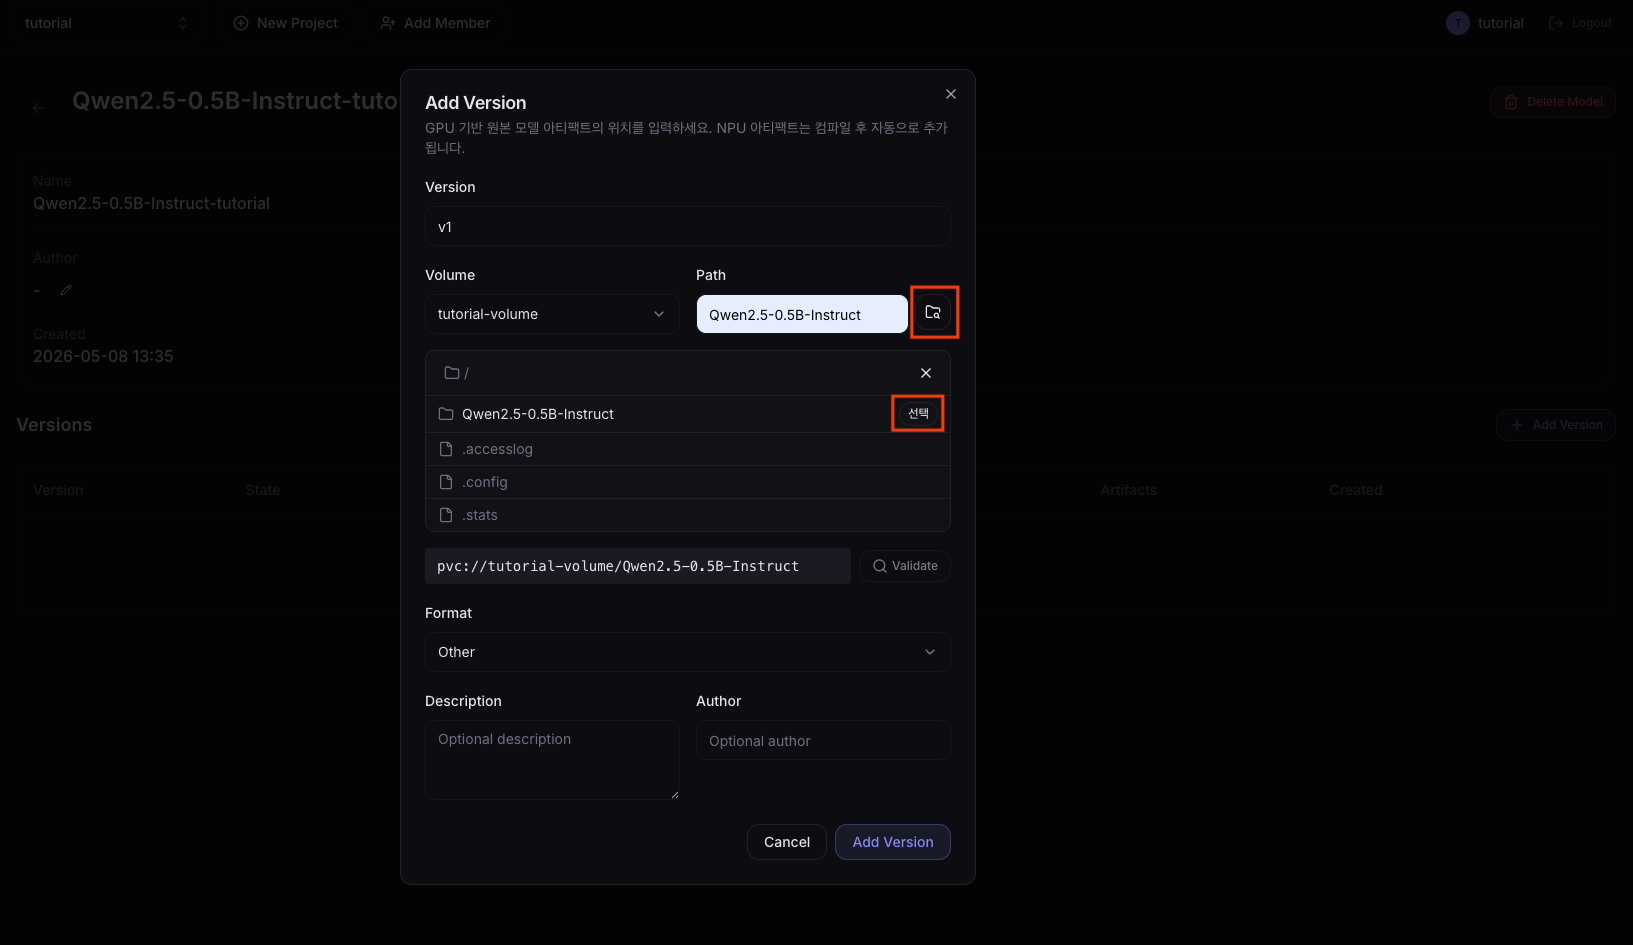
| Field | Description |
|---|---|
| Version | Artifact version |
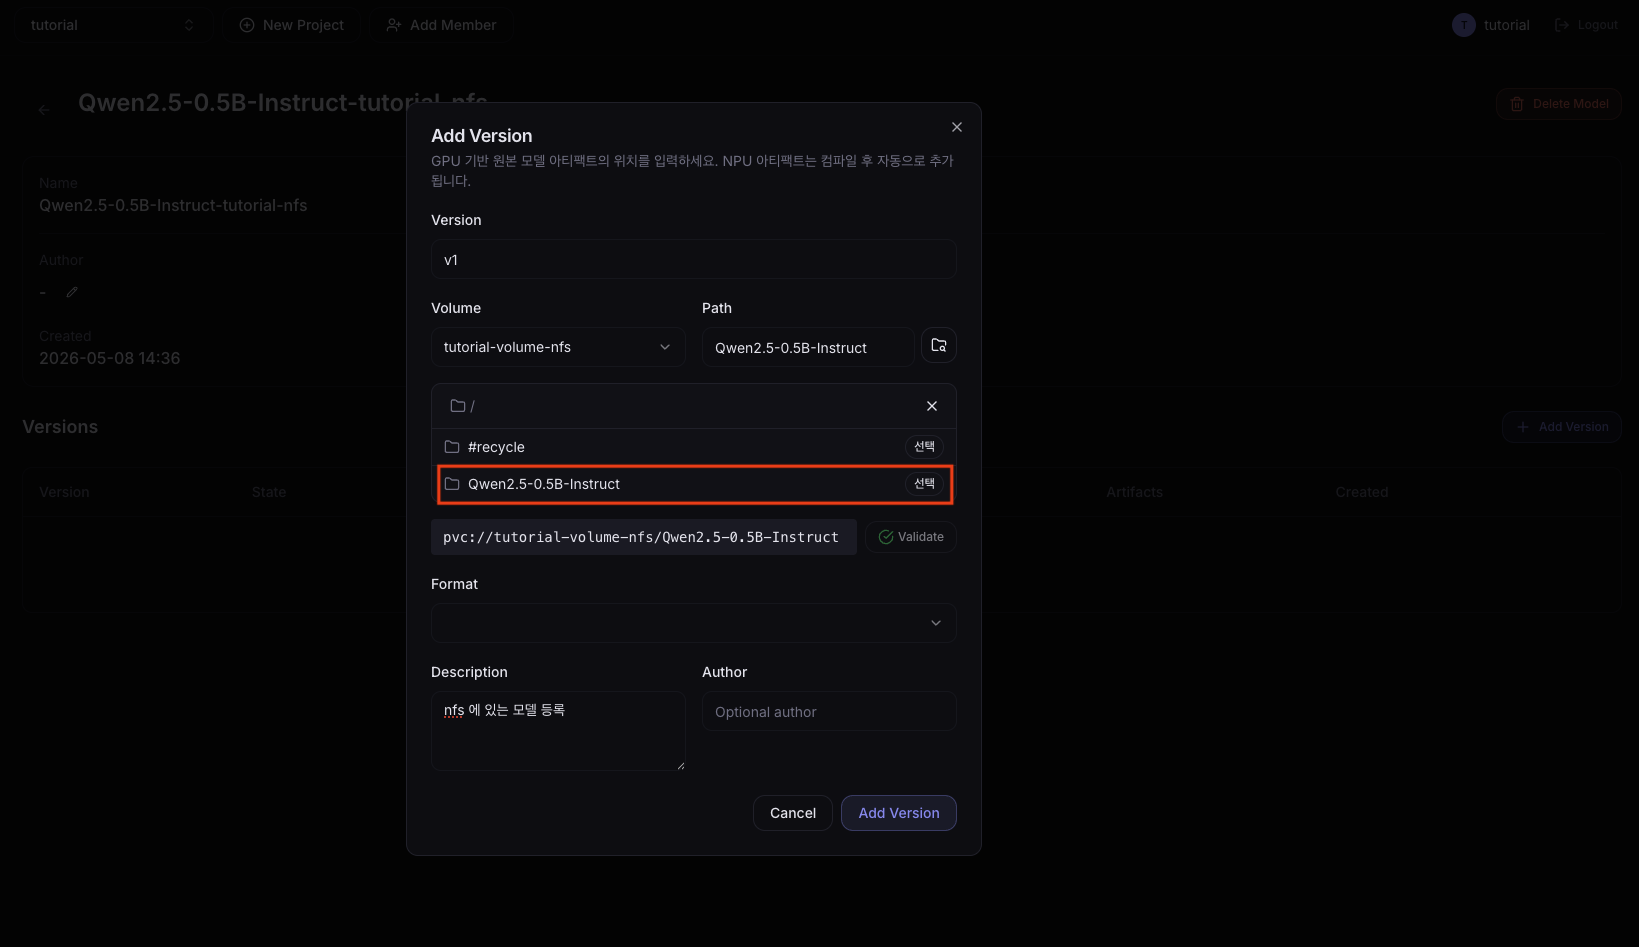
| Volume | Select the Volume where the model files are stored |
| Path | Path to the model file inside the Volume. Clicking the folder icon next to the input shows a list of paths; pressing the select button enables the Validate button at the bottom. |
| Format | Model format (e.g., SafeTensors) |
| Description | Version description (optional) |
| Author | Author (optional) |
When the Validate button turns green and active, click the Register button.
4. Check registration
Clicking the registered model in the Models list shows the added artifact.
Method B: Register a Model from an NFS Path
If the model files are already on a NAS, connect an NFS volume and register directly.
An NFS volume connected to a NAS path must have been created in 01. Create Volume.
Steps 1 and 2 are the same as Method A. Enter Model Name as qwen-instruct-tutorial-nfs.
3. Add an artifact
Proceed the same way as Method A, but in Volume select the NFS volume (tutorial-volume-nfs).
4. Check registration
You can see the added artifact.
Method C: MLflow Integration
Bring a model registered on the MLflow Tracking Server into NuFi.
If you have run experiments in MLflow and registered a model with mlflow.log_model() etc., NuFi's MLflow Integration feature can download that model to a Volume and register it directly. Check the model's Tracking URI, model name, and version in the MLflow UI in advance.
The MLflow server must be reachable from inside the NuFi cluster.
1. Go to the MLflow Integration menu
In the left sidebar, click Resources > Models and press the Integration button. Click the Add Webhook button to enter MLflow information.
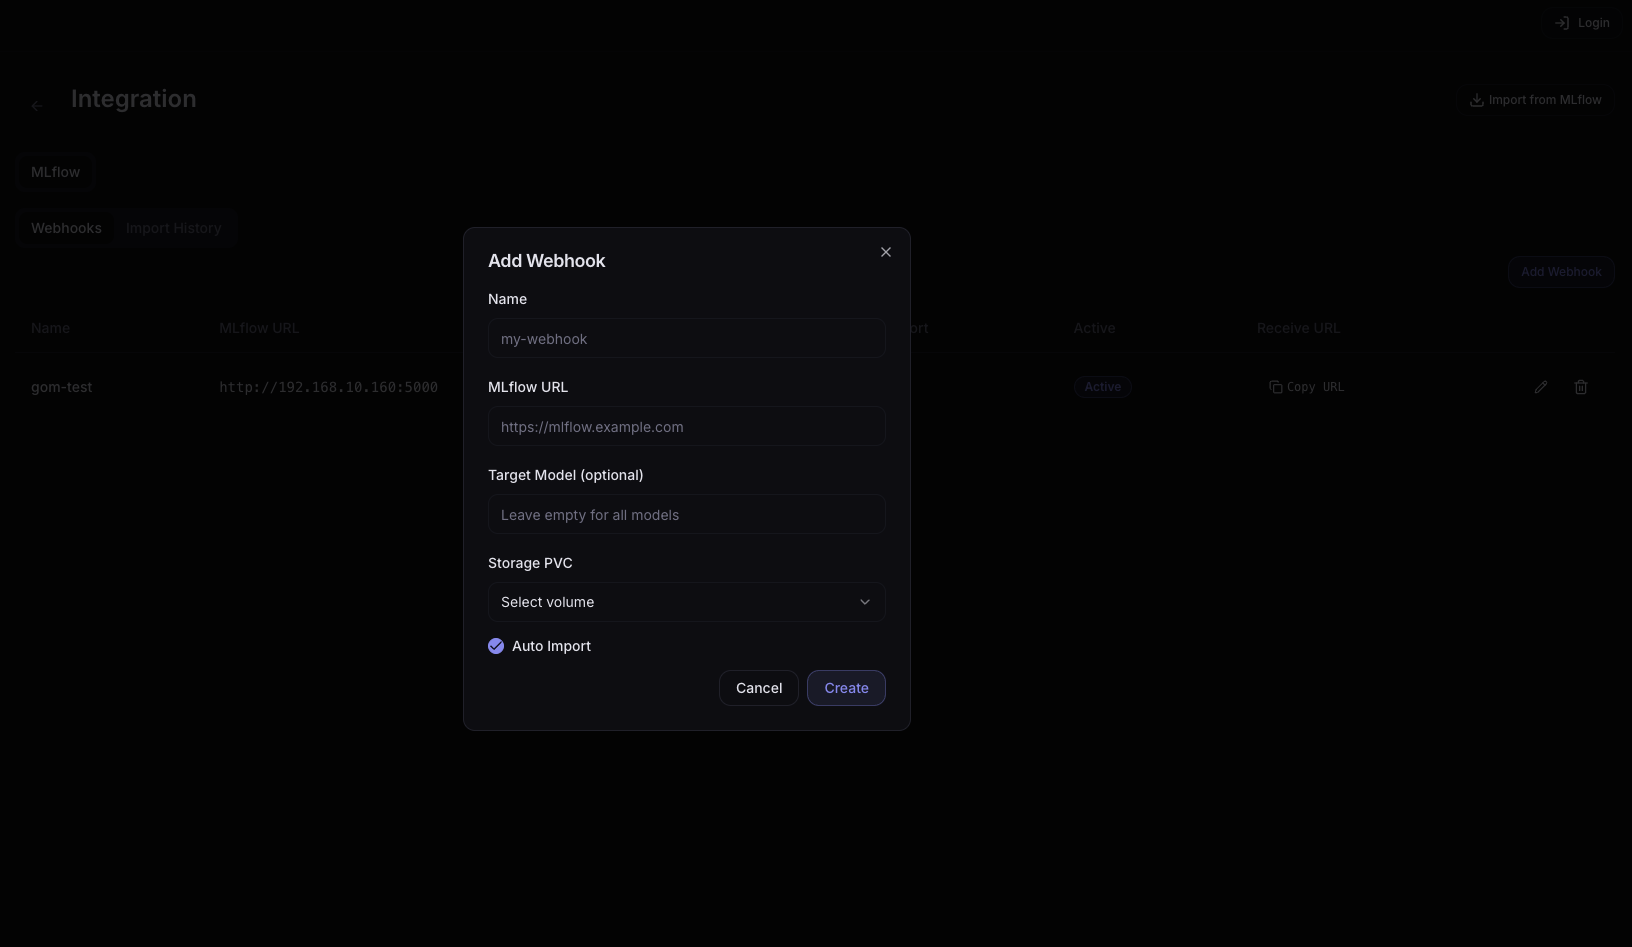
2. Enter MLflow information
| Field | Example value | Description |
|---|---|---|
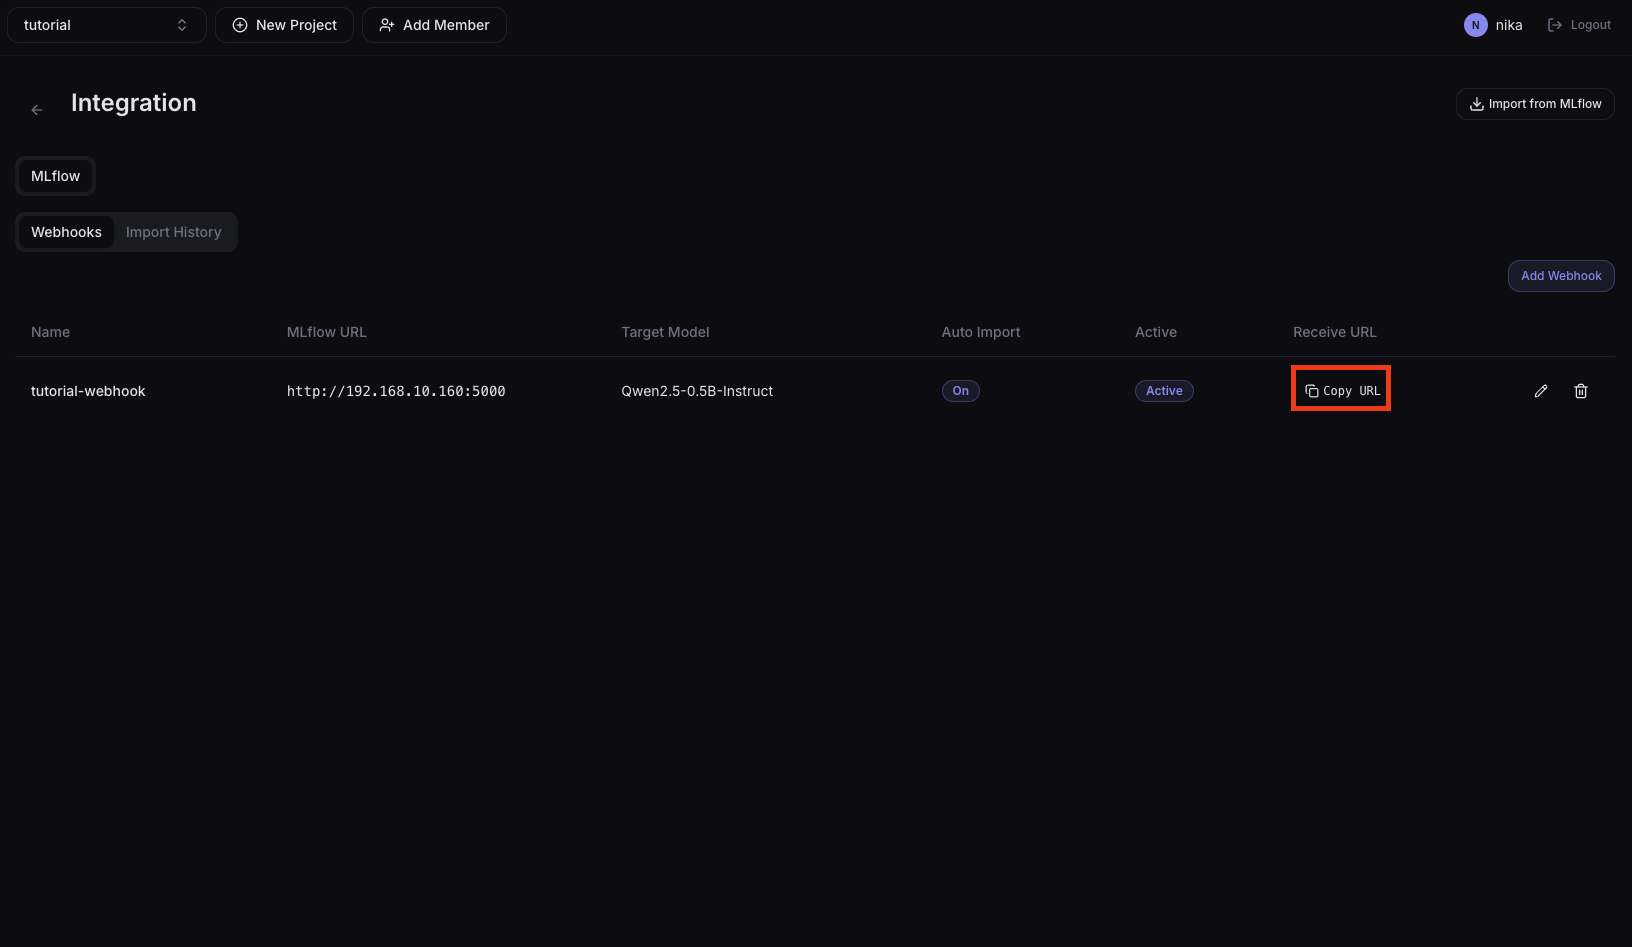
| Name | tutorial-webhook | Webhook name |
| MLflow URL | http://192.168.10.160:5000 | MLflow Tracking Server address |
| Target Model | Qwen2.5-0.5B-Instruct | Model name registered in MLflow |
| Storage PVC | tutorial-volume | Volume where the model files will be stored |
| Auto Import | true | Whether to auto-import on model version creation |
After the Webhook is registered, a Receive URL is generated. Copy this URL.
3. Register the Receive URL with MLflow
After registering the Webhook, you need to register NuFi's Receive URL with MLflow. Connect MLflow to notify NuFi when model versions are created.
from mlflow import MlflowClient

client = MlflowClient(tracking_uri="http://192.168.10.160:5000")
webhook = client.create_webhook(
    name="tutorial-webhook",
    url="https://api.nufi.me/api/v1/models/integration/mlflow/webhooks/11/receive",  # Receive URL
    events=["model_version.created"],
    description="NuFi MLflow model_version.created webhook",
)
print(f"webhook_id={webhook.webhook_id}")
print("[OK] done")
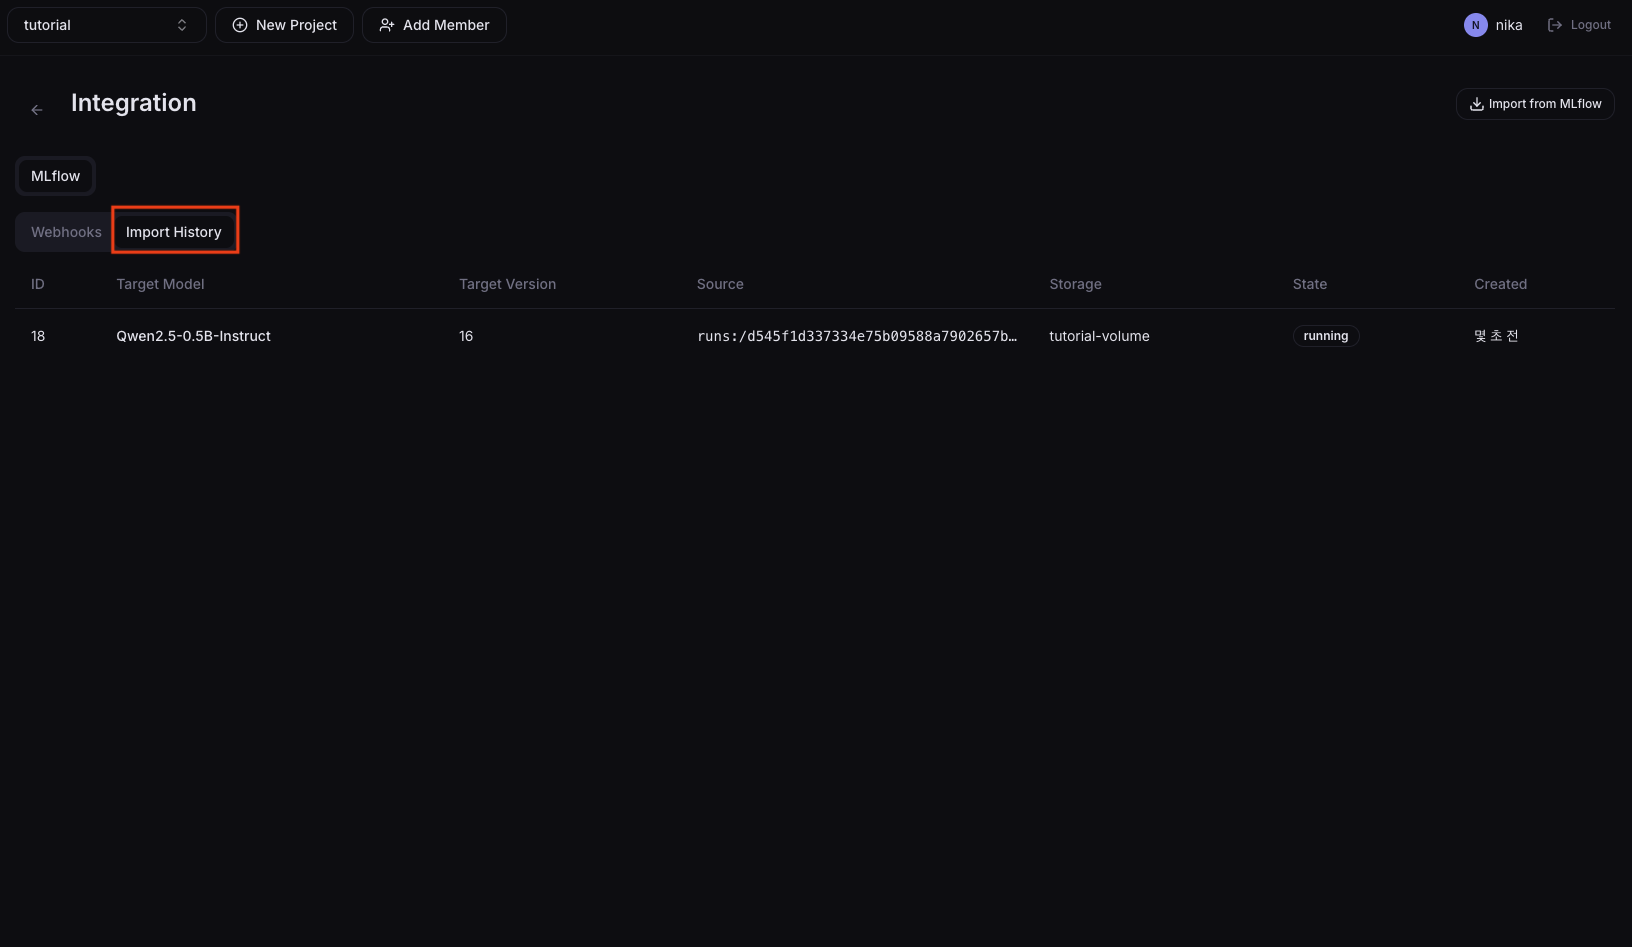
4. Check Integration
When a model is registered in MLflow, it is automatically imported into NuFi. When the Import Job status becomes Succeeded, the model files are saved to the selected Volume and automatically registered in the Models list.
Next Step
→ 05. NPU Compile — Compile to a binary for the RNGD NPU → 07. Deploy Model Serving — Skip compile and deploy on GPU only