Lab
This page walks you through creating a Lab and connecting to a web-based development environment such as Jupyter Notebook or VS Code.
Lab List
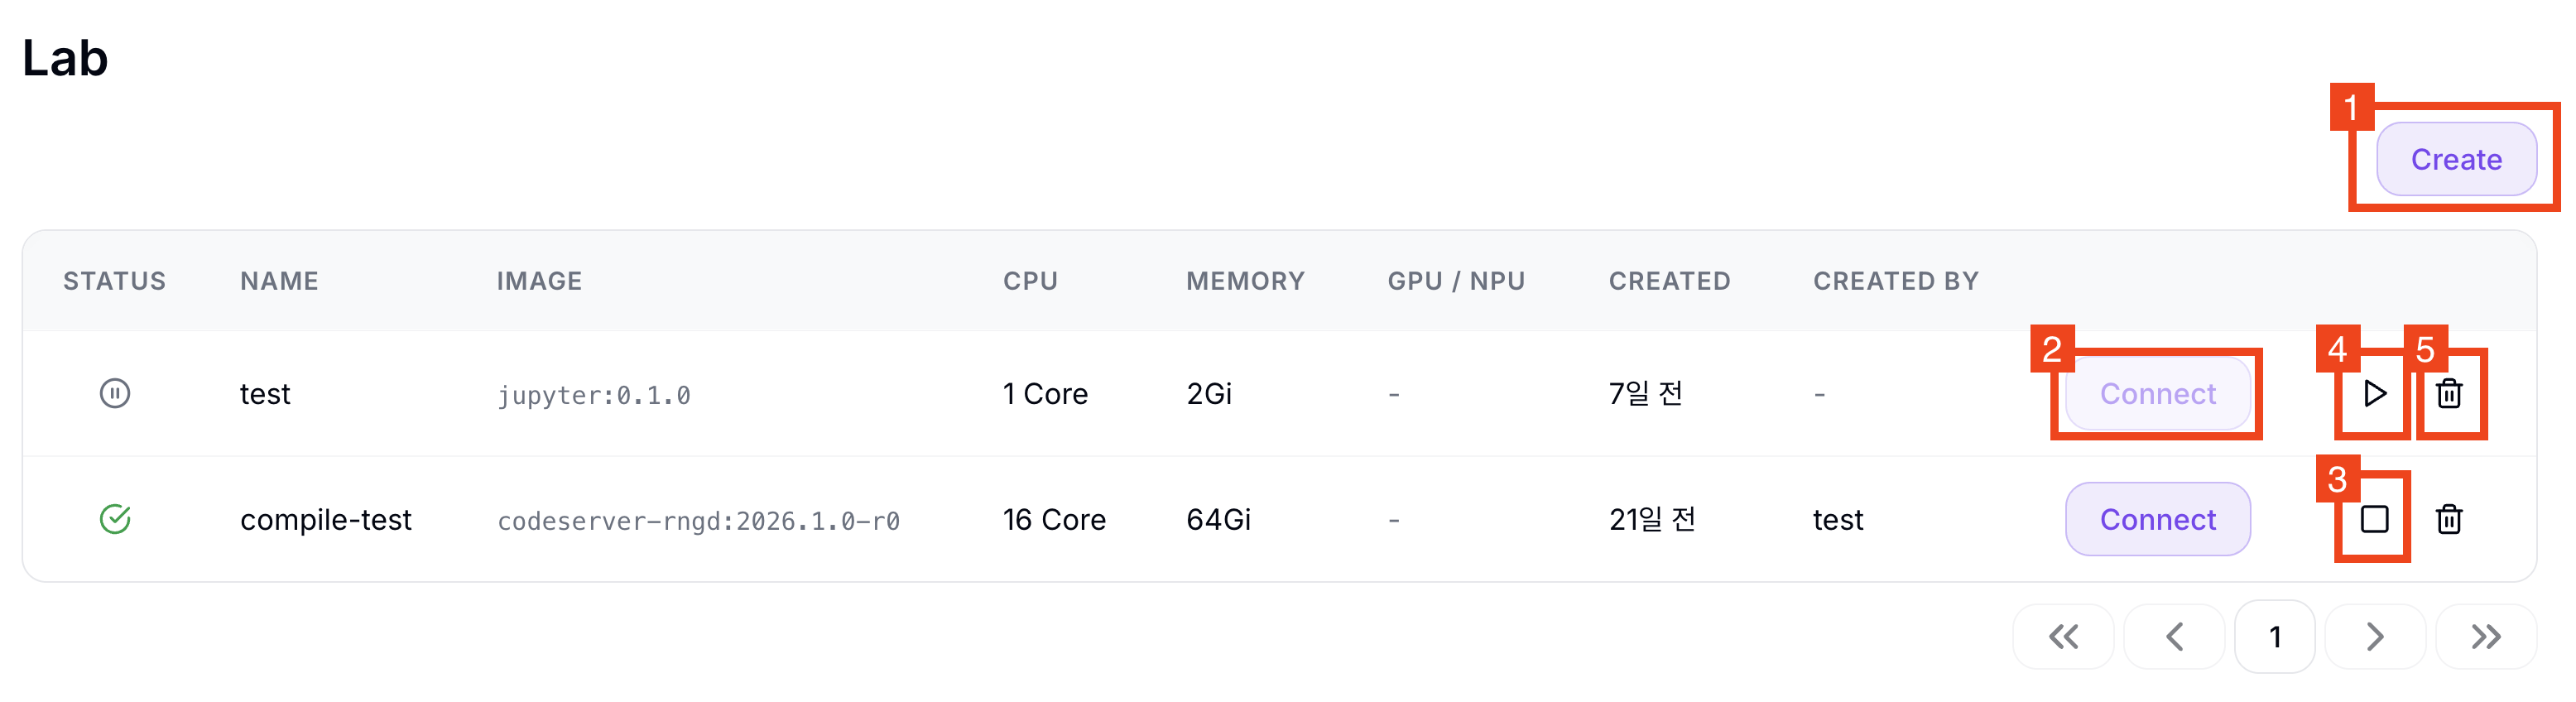
Click Lab in the left sidebar to see the Lab list for the current project.
Actions
| Button | Description |
|---|---|
| ①Create | Create a new Lab |
| ②Connect | Open the development environment |
| ③Stop | Pause the Lab environment. Only the Pod is terminated; configuration and mounted Volume data are preserved. You can restart with Start. |
| ④Start | Restart a stopped Lab environment |
| ⑤Delete | Fully delete the Lab. The configuration is removed and cannot be recovered. Data on mounted Volumes is retained. |
Status
| Status | Color | Description |
|---|---|---|
| Running | Green | Running |
| Stop | Gray | Stopped |
| Pending | Orange | Starting |
| Stopping | Orange | Stopping |
| Error | Red | Error occurred |
What to check on Pending or Error
- If the Pending state lasts several minutes or more, the cluster may be short on the requested accelerator (GPU/NPU). Ask your administrator about cluster accelerator availability.
- If the state becomes Error, verify that the selected image is correct and that mounted Volumes are bound properly. You can delete the Lab and recreate it with adjusted configuration.
Create a Lab
- Click the ① Create button in the upper right.
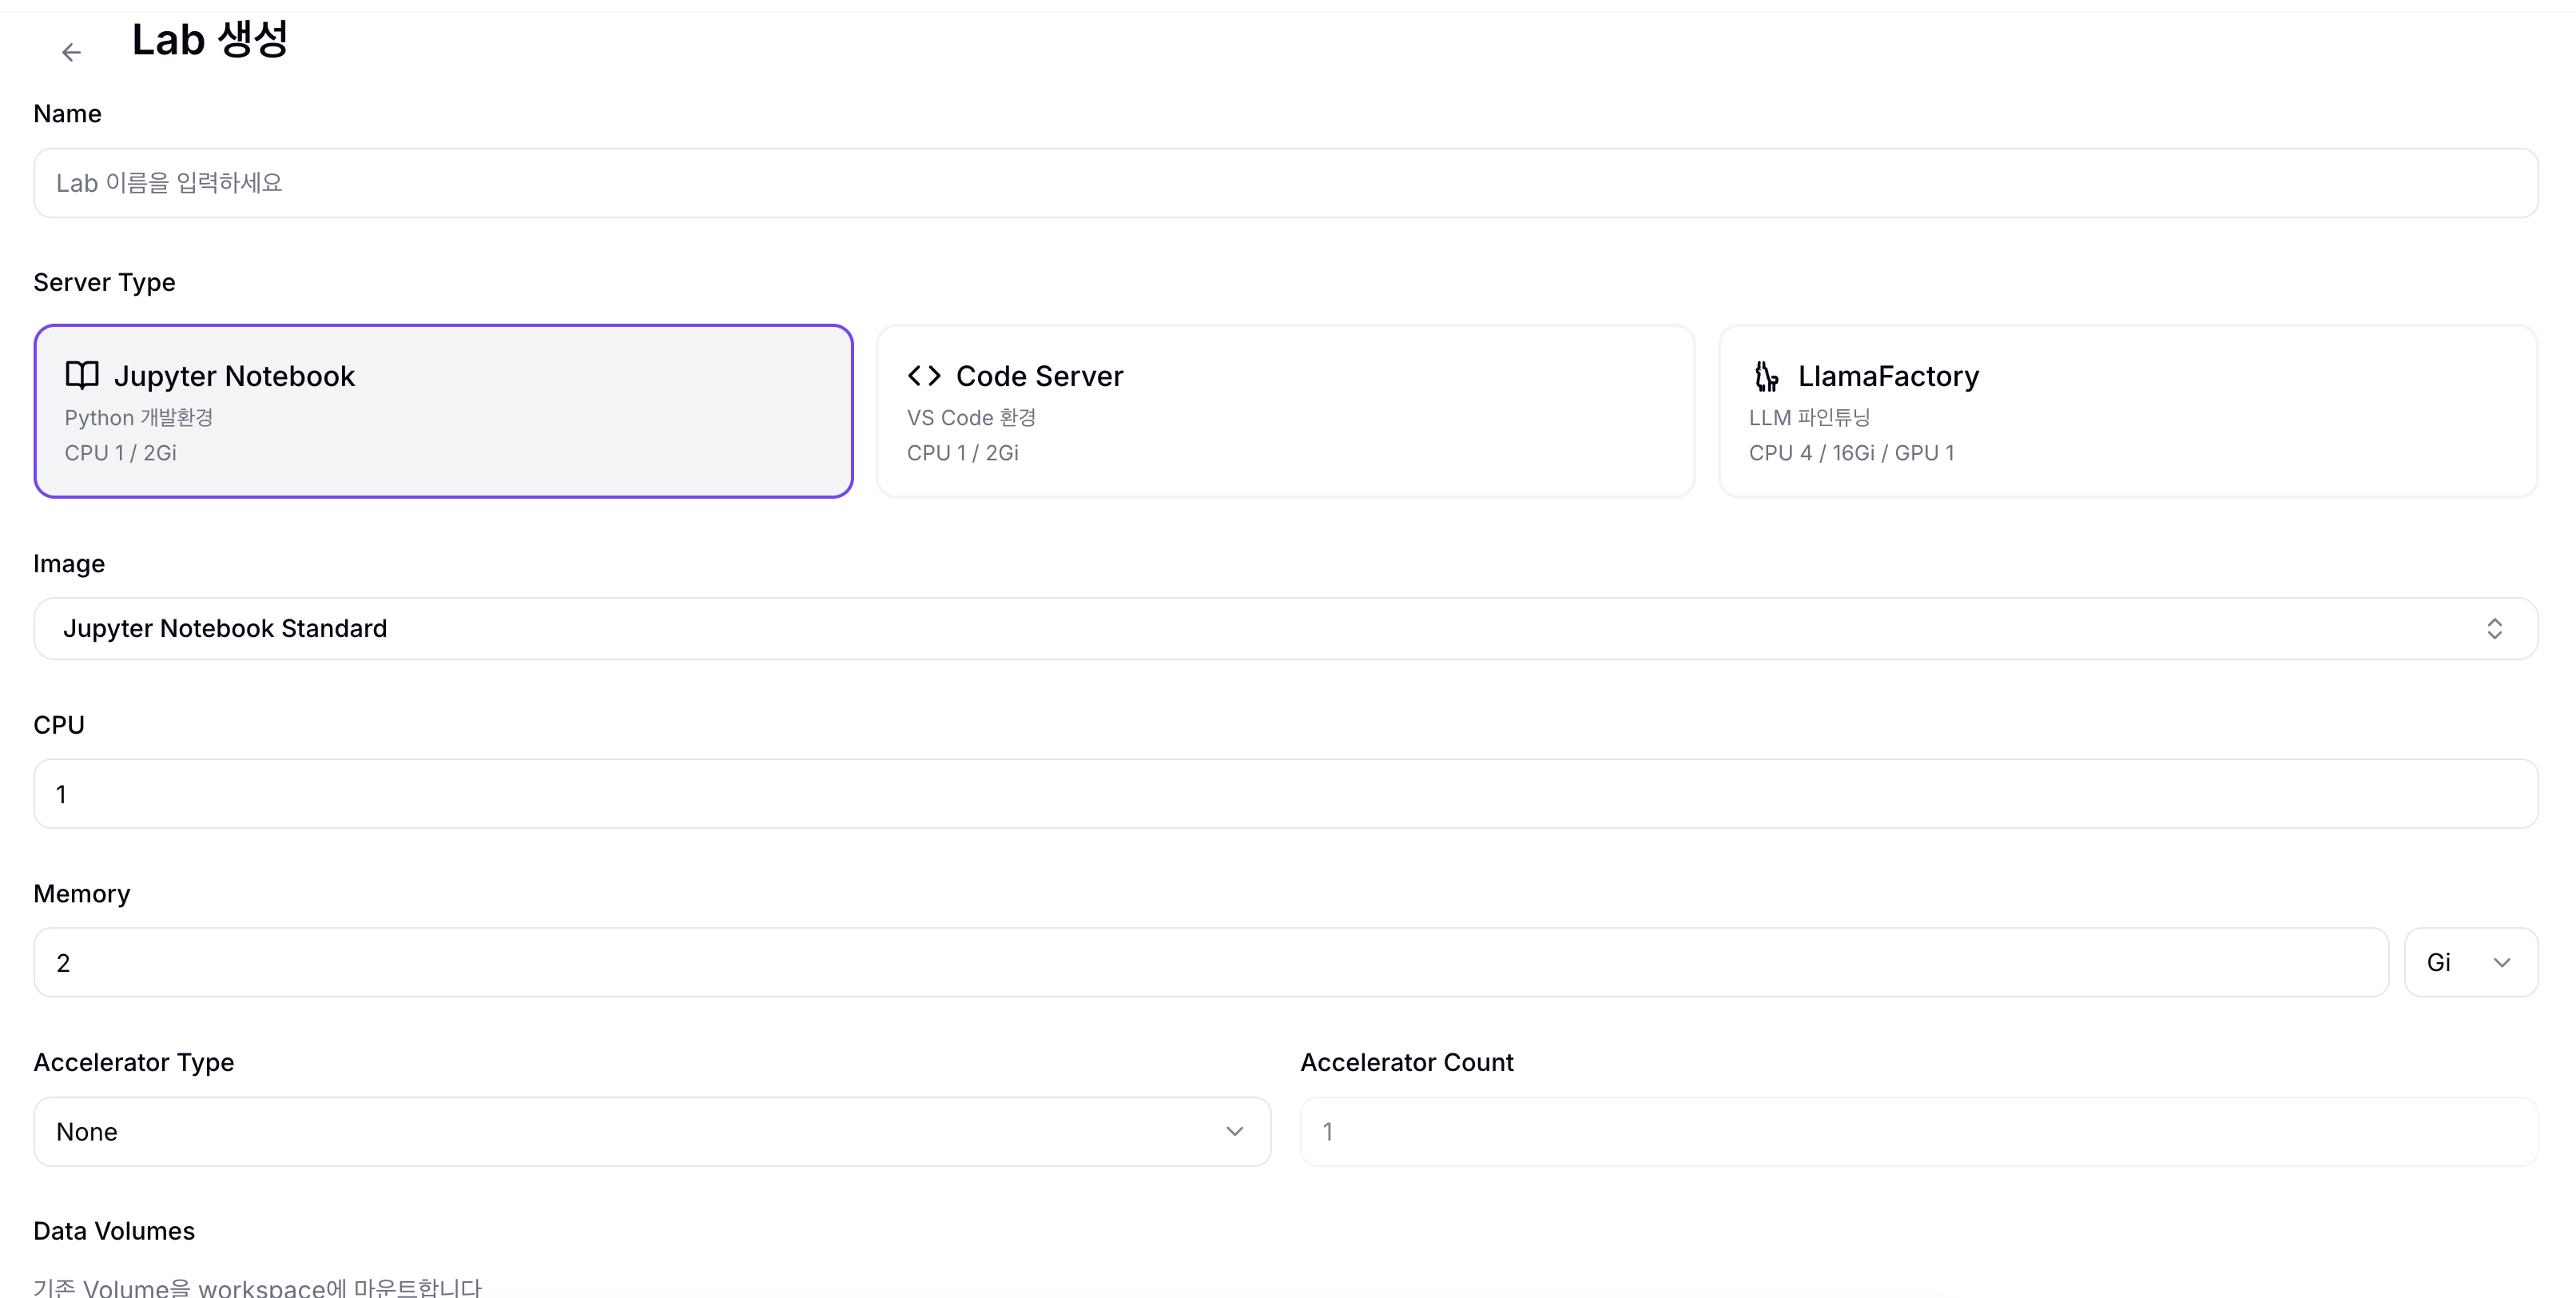
- Enter the basic information.
| Field | Description |
|---|---|
| Name | Lab name (lowercase, digits, hyphens / unique within the project) |
| Server Type | Development environment type: Jupyter Notebook (data analysis, model experiments), Code Server (VS Code-based coding), LlamaFactory (LLM fine-tuning dedicated UI) |
| Image | Container image (select from the list or enter manually) |
| CPU | Number of CPU cores (default: 1) |
| Memory (Gi) | Memory (default: 2) |
| Accelerator Type | GPU/NPU selection (None / Nvidia GPU / Furiosa RNGD, etc.) |
tip
When you select an image from the dropdown, the Accelerator Type is set automatically. When using a custom image, you must select it manually.
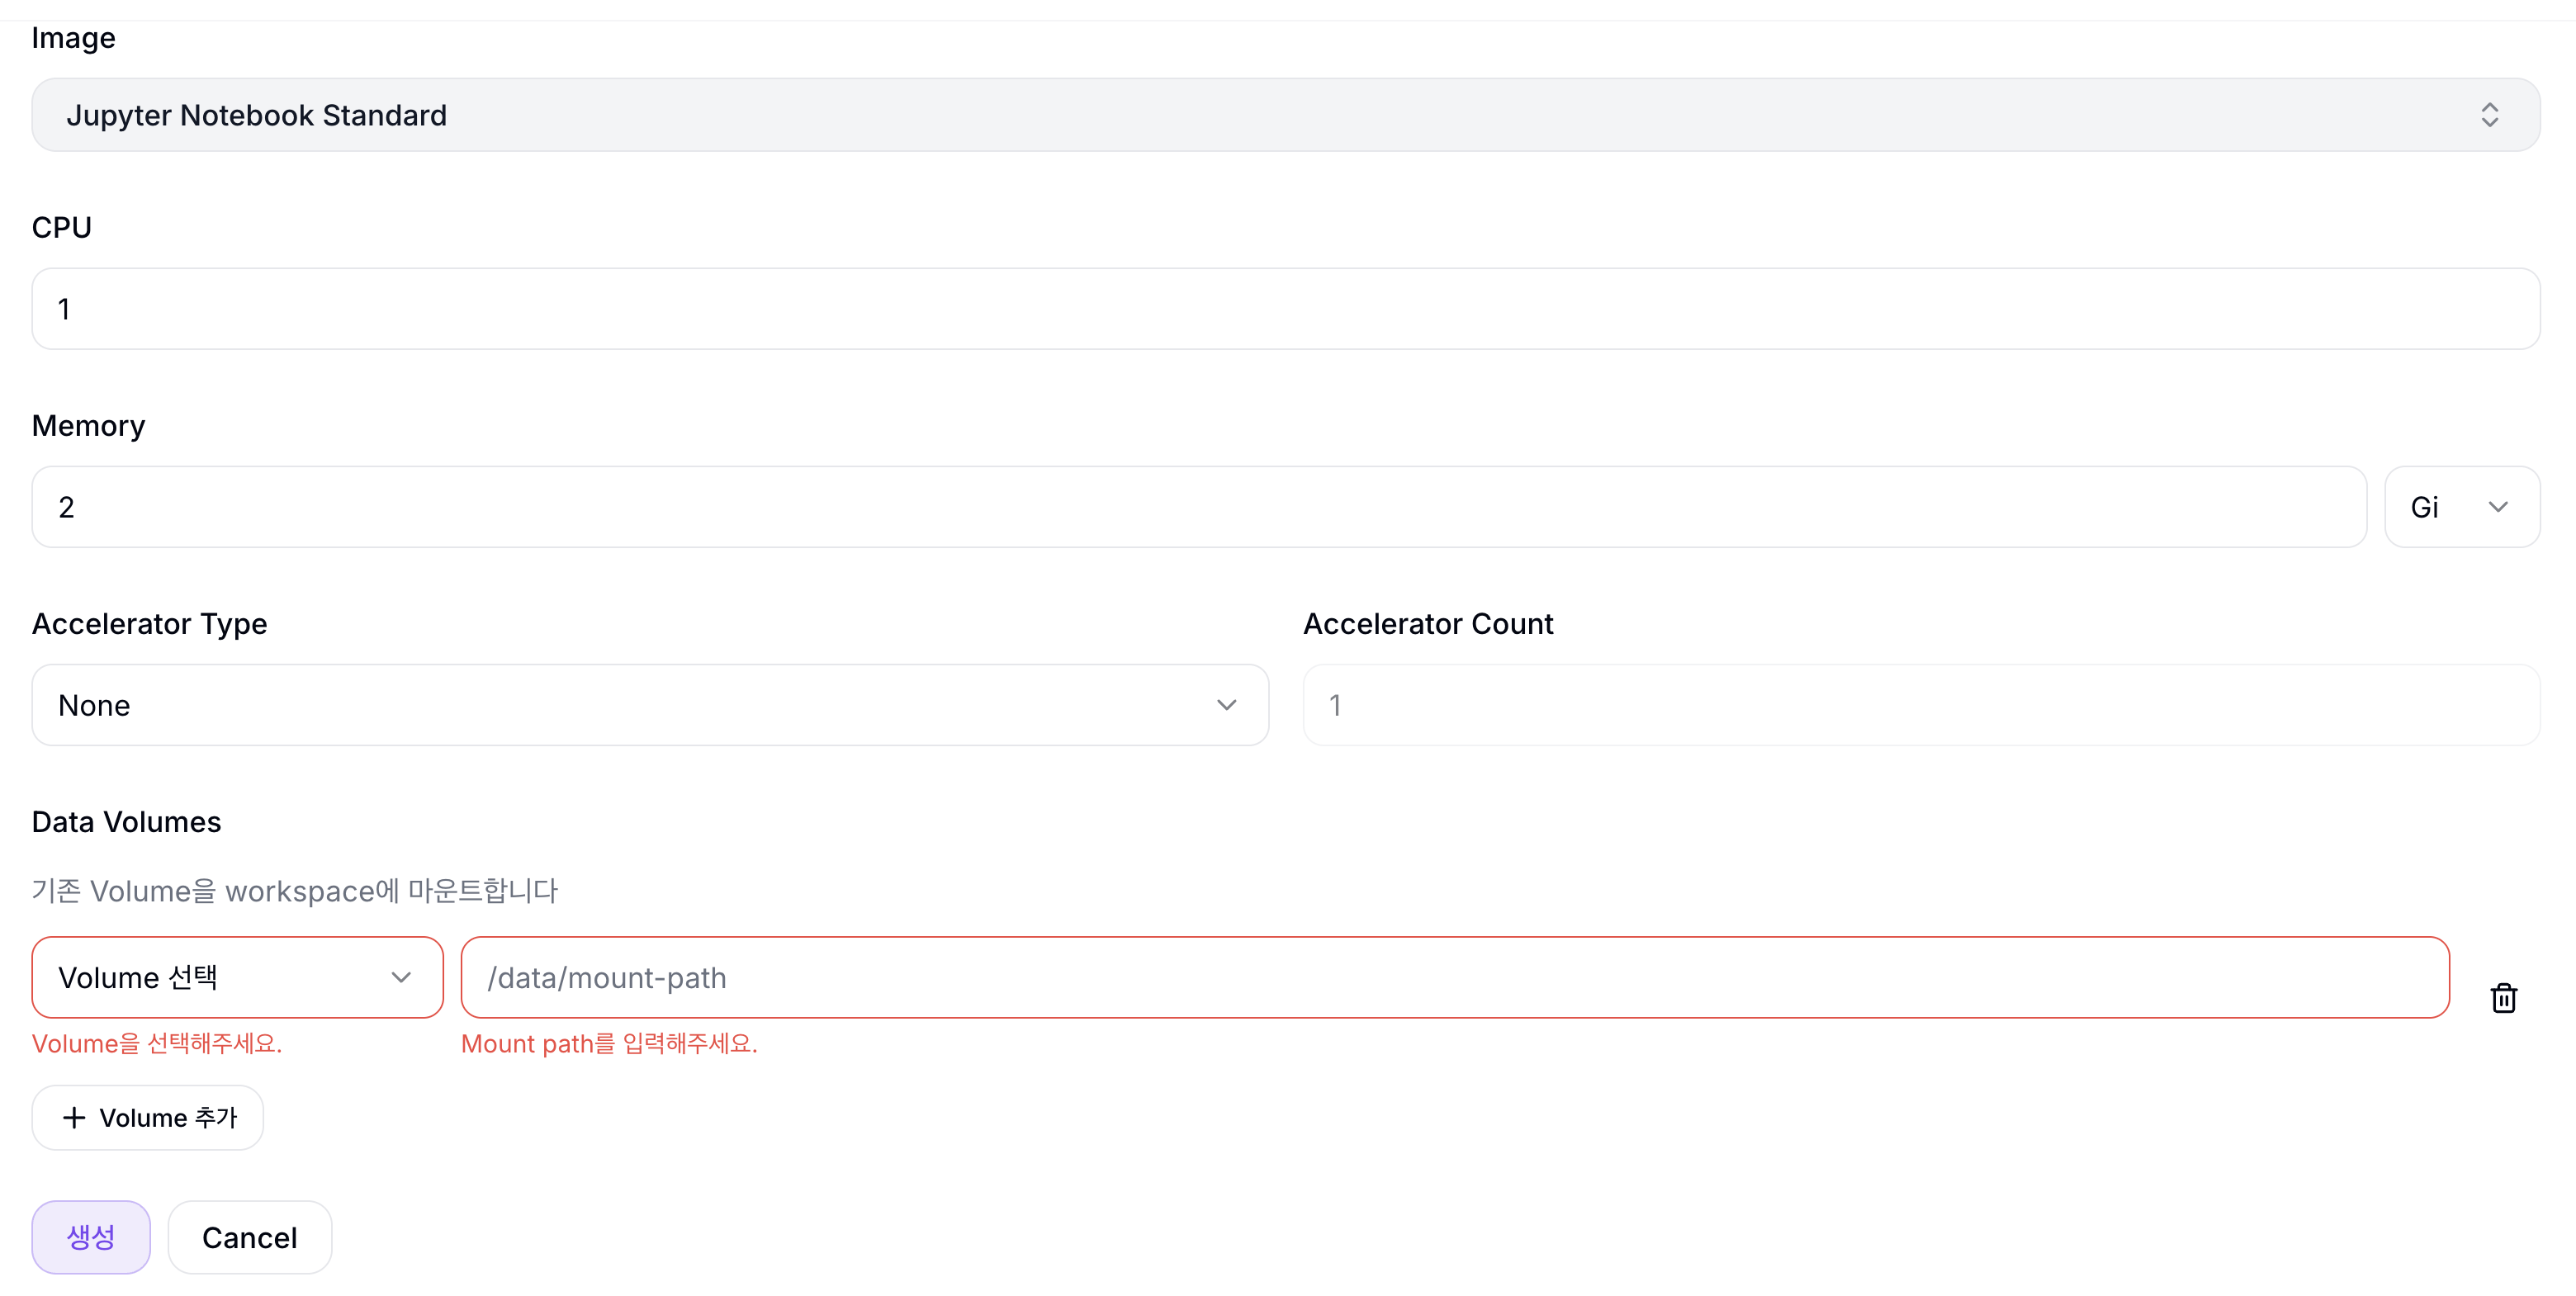
- (Optional) Below the Accelerator settings, add PVCs to mount in the Data Volumes section.
| Section | Description |
|---|---|
| ①Data Volumes | Section for mounting existing PVCs. Add volumes via the + Add Volume button. |
To add multiple PVCs, click the + Add Volume button.
Sharing files between Lab and Serving
To serve a model file you trained in a Lab directly in Serving, mount the same PVC into both the Lab and the Serving. Using the JuiceFS-based juicefs-sc Storage Class enables ReadWriteMany (RWX) access, so multiple Pods can read and write the same Volume simultaneously.
- Click the Submit button.
Connect to a Lab
- In the Lab list, click the Connect button on a Lab whose status is Running.
- The development environment opens in a new tab.