Evaluate Model Quality (EvaluationRun)
This step measures per-model accuracy and response performance. Use it for comparing models or validating performance after NPU compilation.
Evaluation proceeds in the order: Create Dataset → Add Dataset Version → Define Evaluation Criteria → Run Evaluation.
1. Register a Dataset
In the left sidebar, click Datasets.
Click the + Create Dataset button in the upper right and enter:
| Field | Value |
|---|---|
| Name | tutorial-eval |
| Description | (optional) |
Click the created Dataset to go to the detail screen, then click Add Dataset Version in the upper right. Enter main as the Version name.
Choose a data source
Two data sources are supported: HF dataset and JSONL dataset.
- HF dataset: pull a dataset directly from the Hugging Face Hub.
- JSONL dataset: upload a JSONL file you prepared locally.
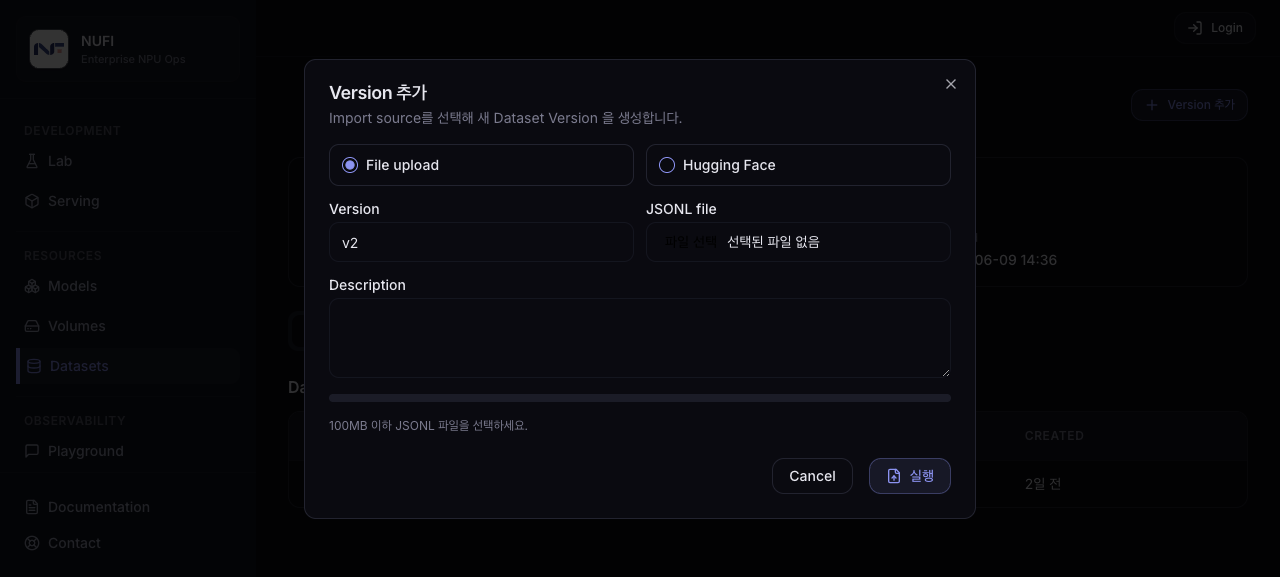
When using an HF dataset
Select HF dataset and enter:
| Field | Value |
|---|---|
| Hugging Face repo ID | openai/gsm8k |
| Subset | main |
| Split | train |
| Revision | main |
These fields take values you can find on the Hugging Face dataset page, and can be changed freely to match the dataset you want to evaluate.
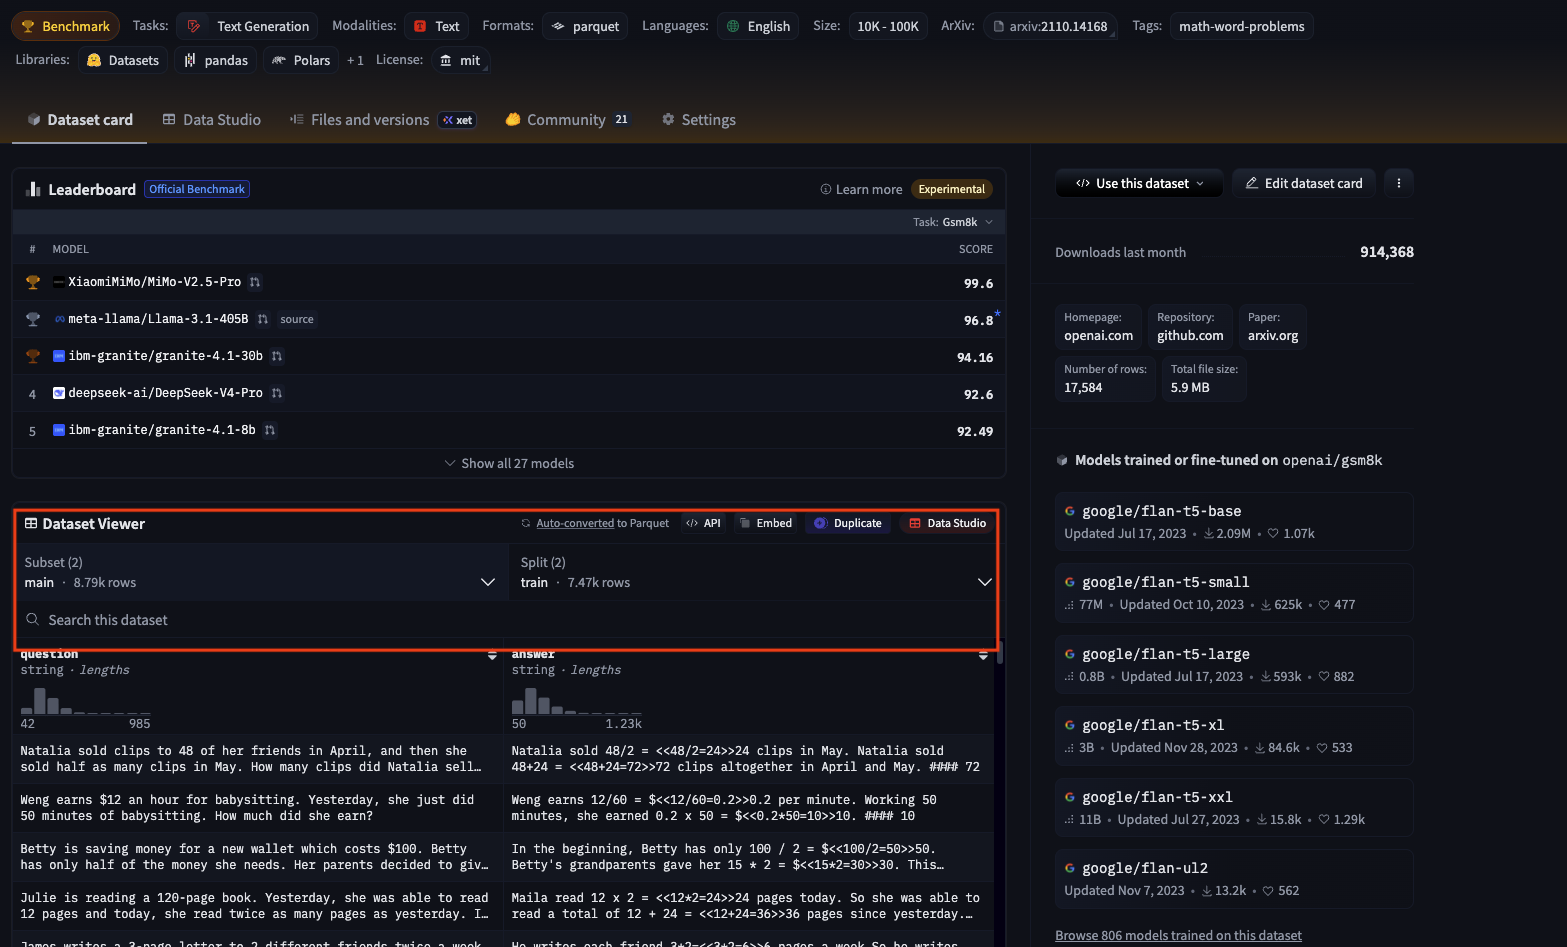
Click the Run button to pull the dataset. When the job completes, the status changes to Ready.
When using a JSONL dataset
If you want to evaluate data you already have, select JSONL dataset. Prepare it as JSON Lines where each line is a single evaluation sample.
{"input": "What is 2+2?", "expected_output": "4"}
{"input": "Capital of France?", "expected_output": "Paris"}
{"input": "Color of the sky?", "expected_output": "Blue"}
input: the question/prompt given to the modelexpected_output: the expected output to compare as the answer
Create a separate Dataset (e.g., tutorial-eval-jsonl), choose JSONL dataset in Add Dataset Version, and upload a file in the format above. From there the flow is the same as the HF dataset case — wait for the status to become Ready.
2. Create Evaluation Criteria
In the Dataset Version detail screen, click the Evaluation Criteria tab and press Create Evaluation Criteria.
The form is built based on the Dataset Version's source schema, so the fields you must enter differ depending on whether you used an HF dataset or a JSONL dataset. Follow the guide for the Dataset type you used.
For an HF dataset
If you're proceeding with an HF dataset (e.g., openai/gsm8k), you'll see the screen below.
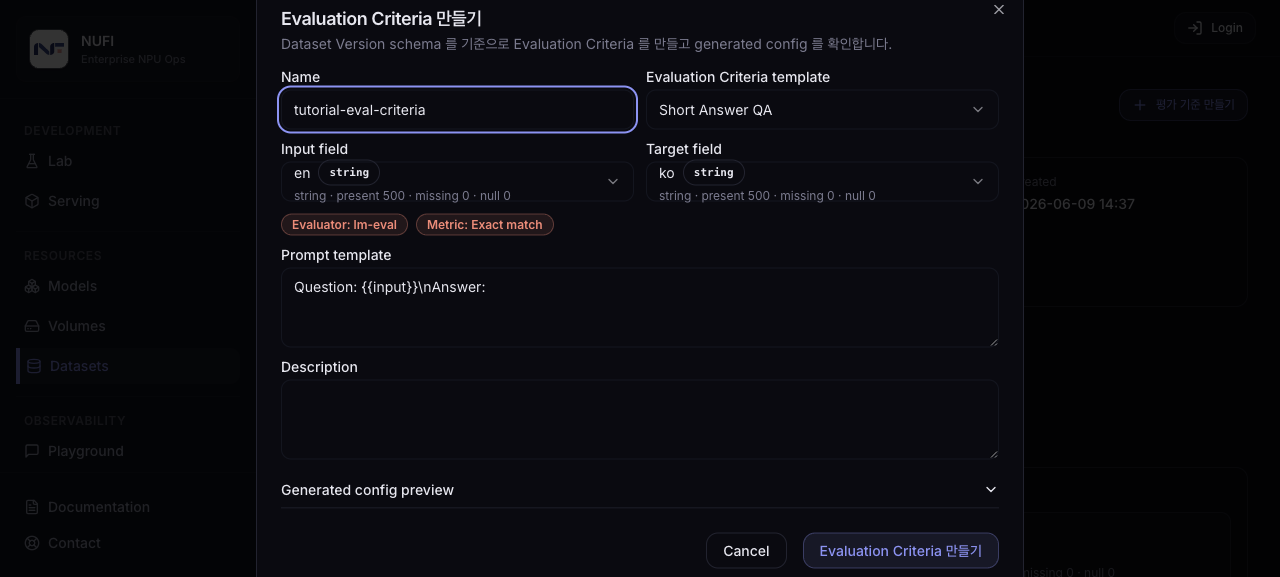
| Field | Value |
|---|---|
| Name | tutorial-eval-criteria |
| Template | Short Answer QA |
| Input field | question |
| Target field | answer |
| Prompt template | {{input}} |
| Description | (optional) |
Field meanings:
- Template: the template that defines which evaluation approach to use. Short-answer QA datasets use
Short Answer QA. - Input field / Target field: the Dataset columns used as the model input and answer.
openai/gsm8kusually usesquestionandanswer. - Prompt template: the prompt sent to the model. The selected input field value replaces
{{input}}.
Verify the settings in Preview and click Create Evaluation Criteria.
For a JSONL dataset
If you're proceeding with a JSONL dataset, you'll see the screen below. Unlike the HF screen, fields appear that let you specify which JSONL keys to use as input/expected output.
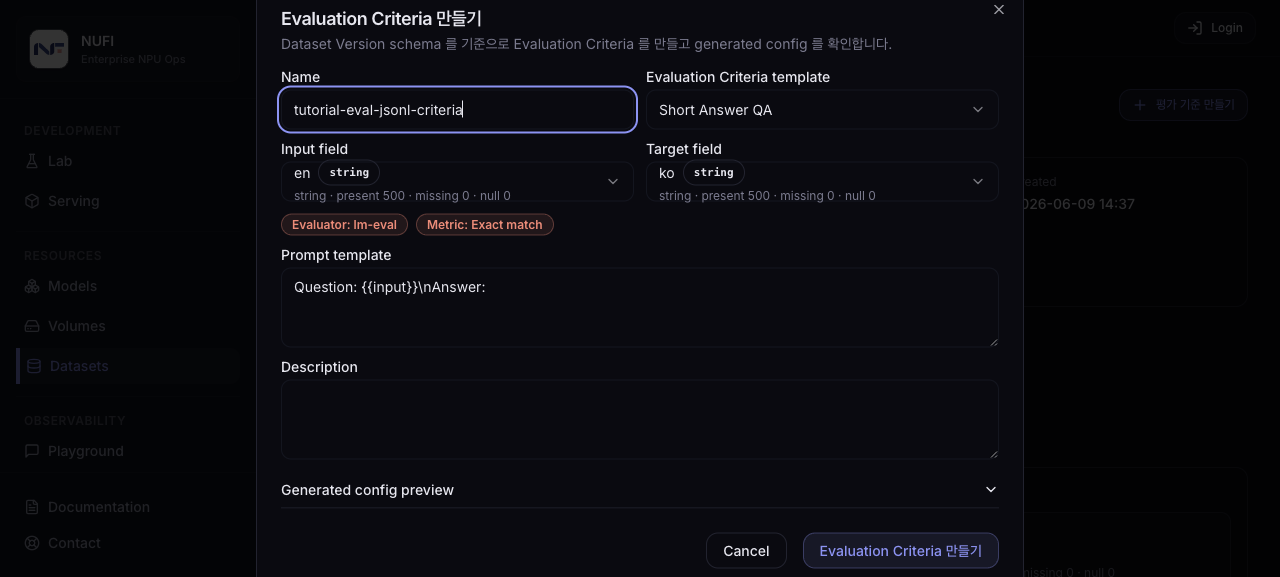
| Field | Value |
|---|---|
| Name | tutorial-eval-jsonl-criteria |
| Template | Short Answer QA |
| Input field | input |
| Target field | expected_output |
| Prompt template | {{input}} |
| Description | (optional) |
Field meanings:
- Template: short-answer QA JSONL generally uses
Short Answer QA. - Input field / Target field: the key names in each JSONL line used as the model input and the expected answer. For the example JSONL above, these are
inputandexpected_outputrespectively. - Prompt template: the actual prompt shape sent to the model. The
{{input}}placeholder is replaced with the JSONLinputvalue. Edit this template when you want to wrap the input with system instructions or extra context.
Check the actually-filled prompt and expected output in Preview, then save. The subsequent evaluation flow is identical to the HF dataset case.
3. Run Evaluation
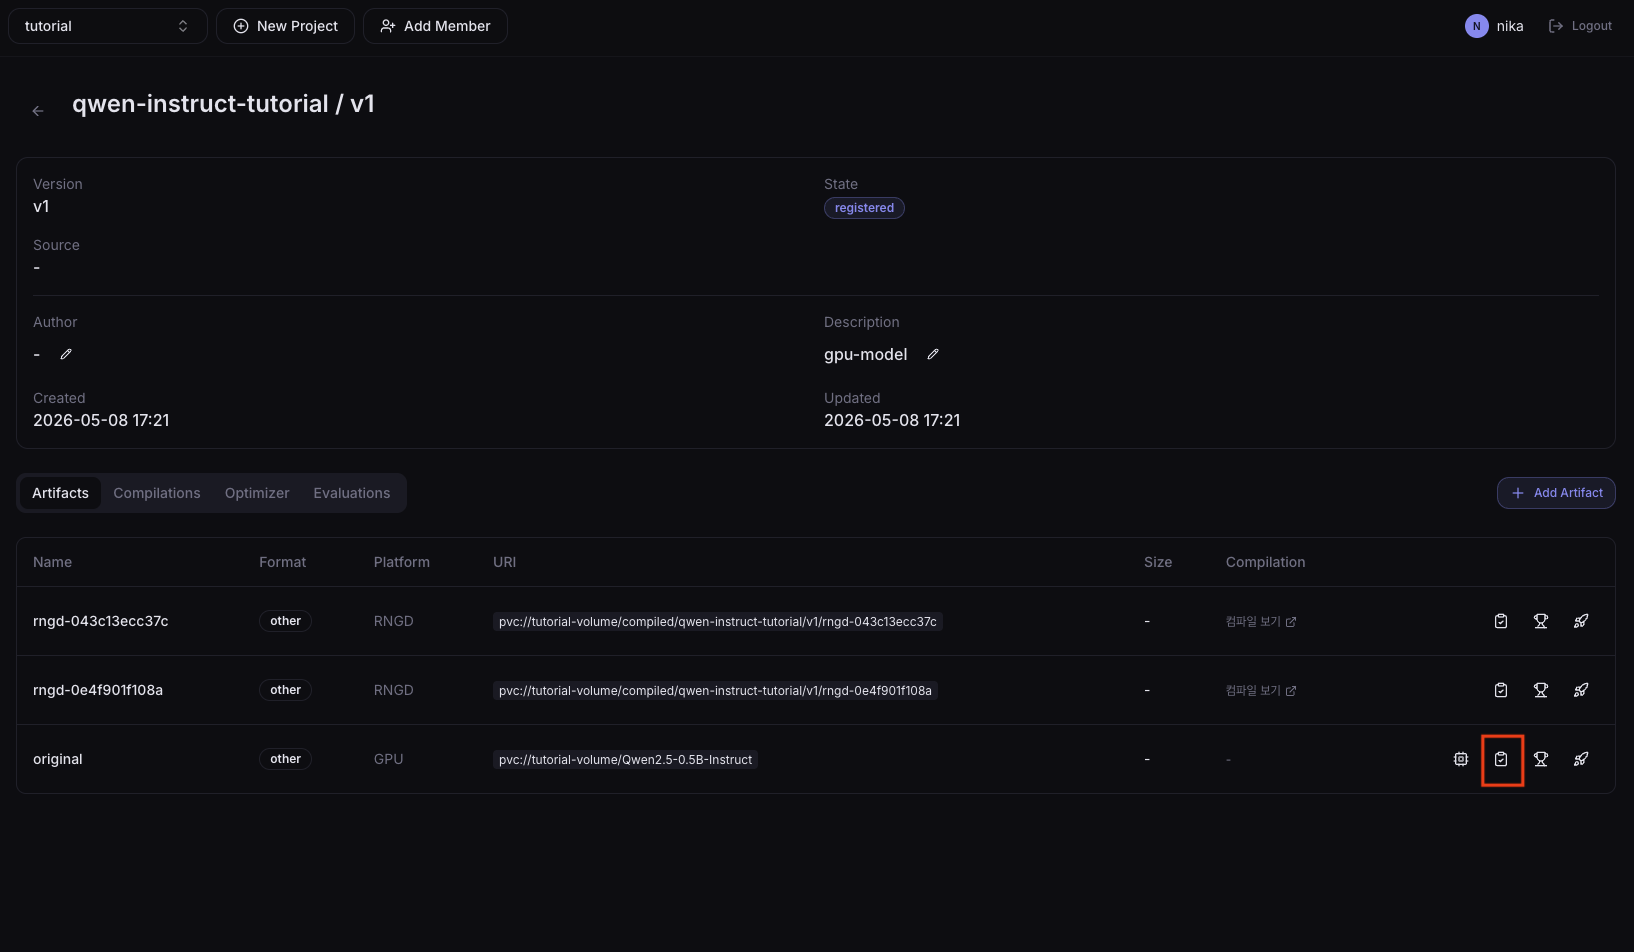
Click the Eval button on the screen above to open a 3-step wizard.
Step 1. Select Dataset
Select the Dataset to evaluate. Pick the one you registered earlier, matching the Dataset type you used.
- For an HF dataset:
tutorial-eval - For a JSONL dataset:
tutorial-eval-jsonl
Step 2. Select Evaluation Criteria
Select the Evaluation Criteria that defines how to evaluate. Pick the Criteria you created earlier, matching the Dataset type.
- For an HF dataset:
tutorial-eval-criteria(Short Answer QA, input=question, target=answer) - For a JSONL dataset:
tutorial-eval-jsonl-criteria(Short Answer QA, input=input, target=expected_output)
Step 3. Column mapping and run options
Shows which Dataset columns connect to the input columns the Evaluation Criteria requires (e.g., question, answer). Datasets that follow a standard schema like gsm8k work fine with the defaults. Adjust the mapping only when your Dataset uses different column names or you want to substitute another column for some field.
Next, review the evaluation run options. Each option means:
- Limit (optional): cap on the number of samples to use in evaluation. Leave empty to use the whole Dataset. Set a small value (e.g., 10) to quickly verify it runs.
- Batch size: the input batch size sent to the model at once. Larger values increase throughput but use more memory. Start with
1. - Concurrent request count: number of requests sent concurrently to the serving endpoint. Higher values speed up evaluation but increase load on serving resources. Start with
1. - Few-shot count (optional): the number of examples to include in the prompt. Reasoning tasks like gsm8k typically use 5–8, but leaving it empty uses the default defined in the Evaluation Criteria.
- Serving CPU / Serving memory / Serving accelerator count: resource requests for the serving Pod brought up temporarily for evaluation.
The defaults are fine. Adjust only the values you need based on the descriptions above, then run the evaluation.
4. Check Results
Open the Evaluations tab on the Model Version detail page to see running and completed evaluations. When an evaluation completes, the status becomes Succeeded; click the result to view detailed metrics.
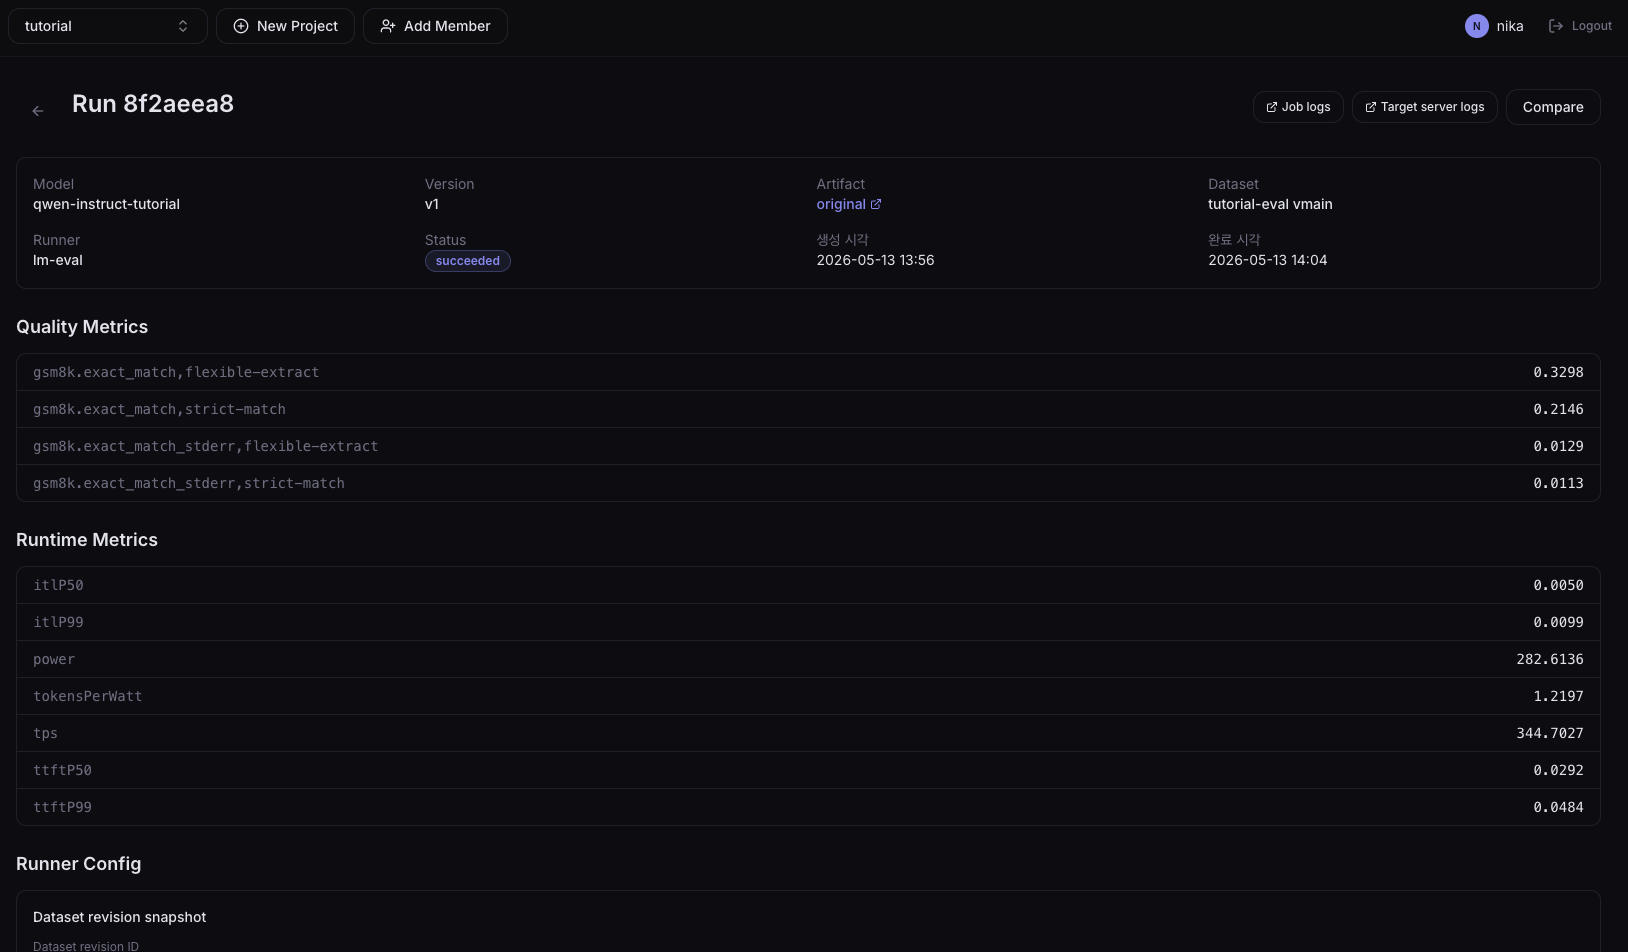
The metrics on the detail screen split into Quality Metrics (model accuracy) and Runtime Metrics (serving performance).
Quality Metrics
Metrics that show how often the model got the answer right. The Short Answer QA criteria in this tutorial compares model output with the selected target field and reports exact_match.
exact_match: the share of model outputs that match the target field value. Closer to1.0means higher accuracy.- Smoke tests with a small
Limitcan swing a lot from only a few samples. When comparing GPU and NPU artifacts, use the same DatasetVersion, Evaluation Criteria, and run options.
Runtime Metrics
Performance metrics measured at the serving Pod brought up during evaluation.
ttftP50/ttftP99(seconds): Time To First Token. Median (P50) and 99th-percentile (P99) time from request to first returned token. Drives perceived response latency.itlP50/itlP99(seconds): Inter-Token Latency. P50/P99 of the gap between successive tokens after the first, indicating streaming response speed.tps: Tokens Per Second. Output tokens per second (throughput). Higher is better.power(W): average power consumption measured during evaluation.tokensPerWatt: tokens generated per watt (efficiency, equivalent totps / power). For the same model, NPU (rngd) artifacts typically score higher than GPU.
5. Compare Results (GPU vs NPU)
NPU compilation can slightly change accuracy compared to GPU due to quantization and operator substitution. Before rolling out to production, evaluate the same model's GPU artifact and NPU compile result on the same Dataset and directly compare the two results.
Prepare the comparison evaluation
Run two evaluations against the same DatasetVersion (tutorial-eval / main). Both evaluations must use the same Evaluation Criteria to align the results 1:1.
| Run | Target artifact | DatasetVersion | Evaluation Criteria |
|---|---|---|---|
| Run A | GPU (base) | tutorial-eval / main | tutorial-eval-criteria |
| Run B | NPU (compile result, e.g., rngd) | tutorial-eval / main | tutorial-eval-criteria |
Compare screen
When both evaluations reach the Succeeded state, select the Runs to compare from the Evaluations list and click the Compare button.
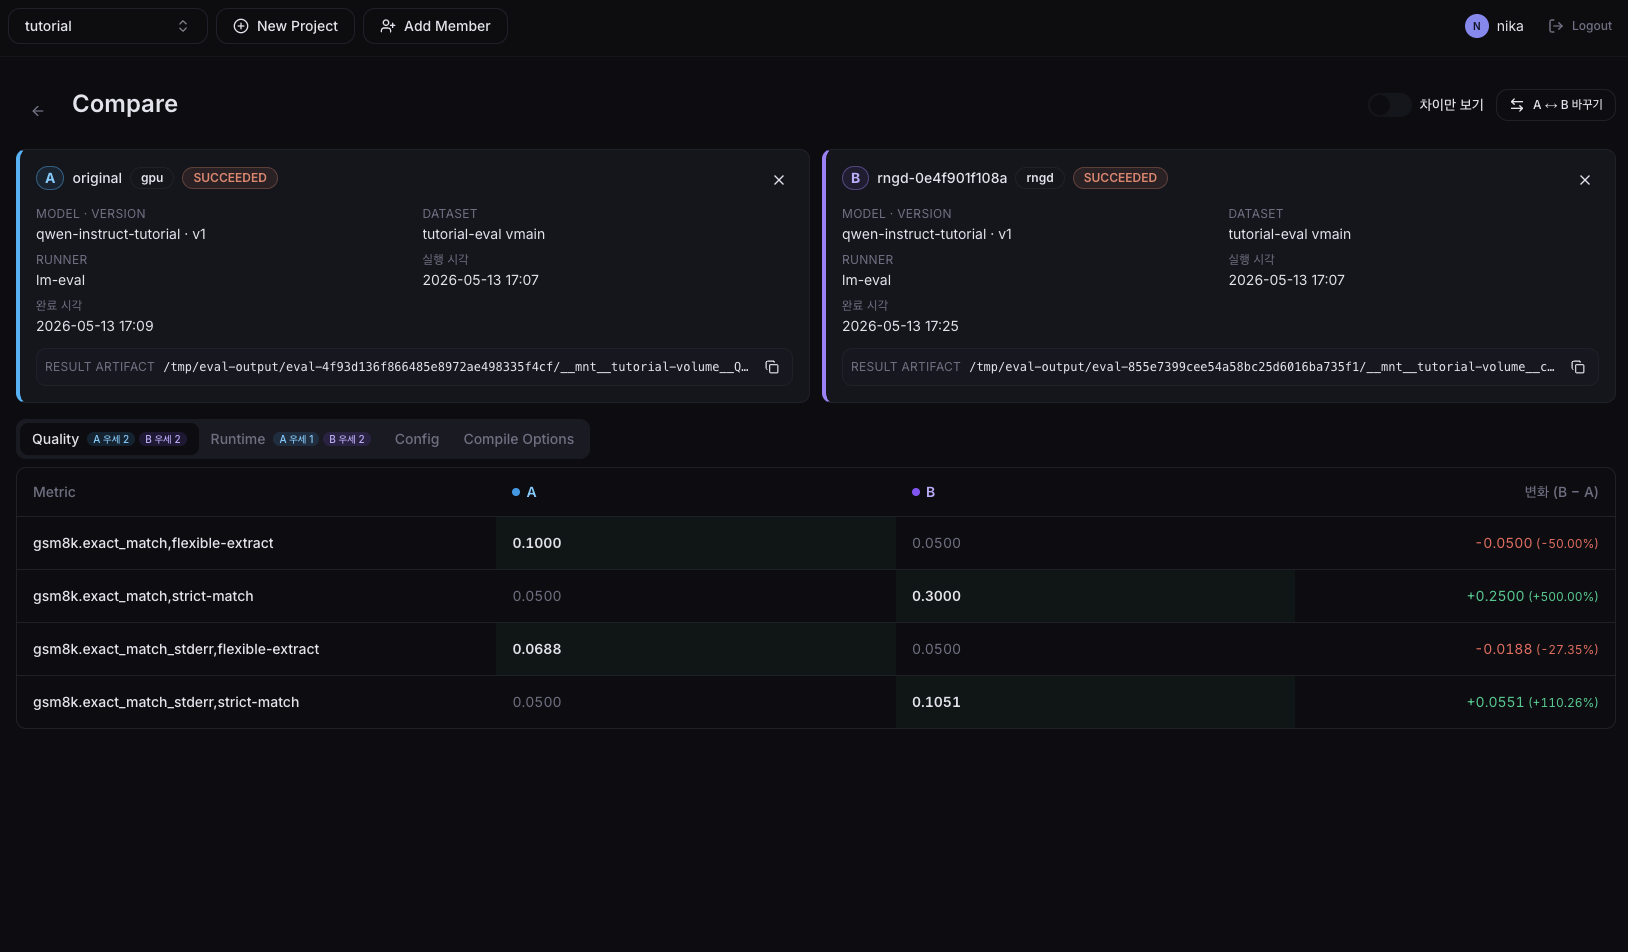
The comparison screen shows Quality Metrics and Runtime Metrics for the two Runs side by side, letting you see at a glance:
- Accuracy loss: how much Quality Metrics such as
exact_matchchanged versus GPU. Results from a smallLimitcan vary because they use fewer samples. - Speed/efficiency gain: how much faster and more efficient the NPU is versus the GPU on Runtime Metrics like
tps,ttft, andtokensPerWatt.
Next Step
→ 07. Deploy Model Serving — Deploy on NPU or GPU