External Images
Administrators can upload container images brought in from outside as tar files and register them in the platform's internal registry. Registered images can be selected when creating a Serving or a Lab.
This menu appears only for accounts that have the nufi-admin role.
Prerequisites
- NuFi must be installed and the dashboard accessible.
- You must be logged in as an account granted the
nufi-adminrole. - The image you want to upload must be saved as a tar file via the
docker savecommand.
External Images list
In the left sidebar, click Admin > External Images.
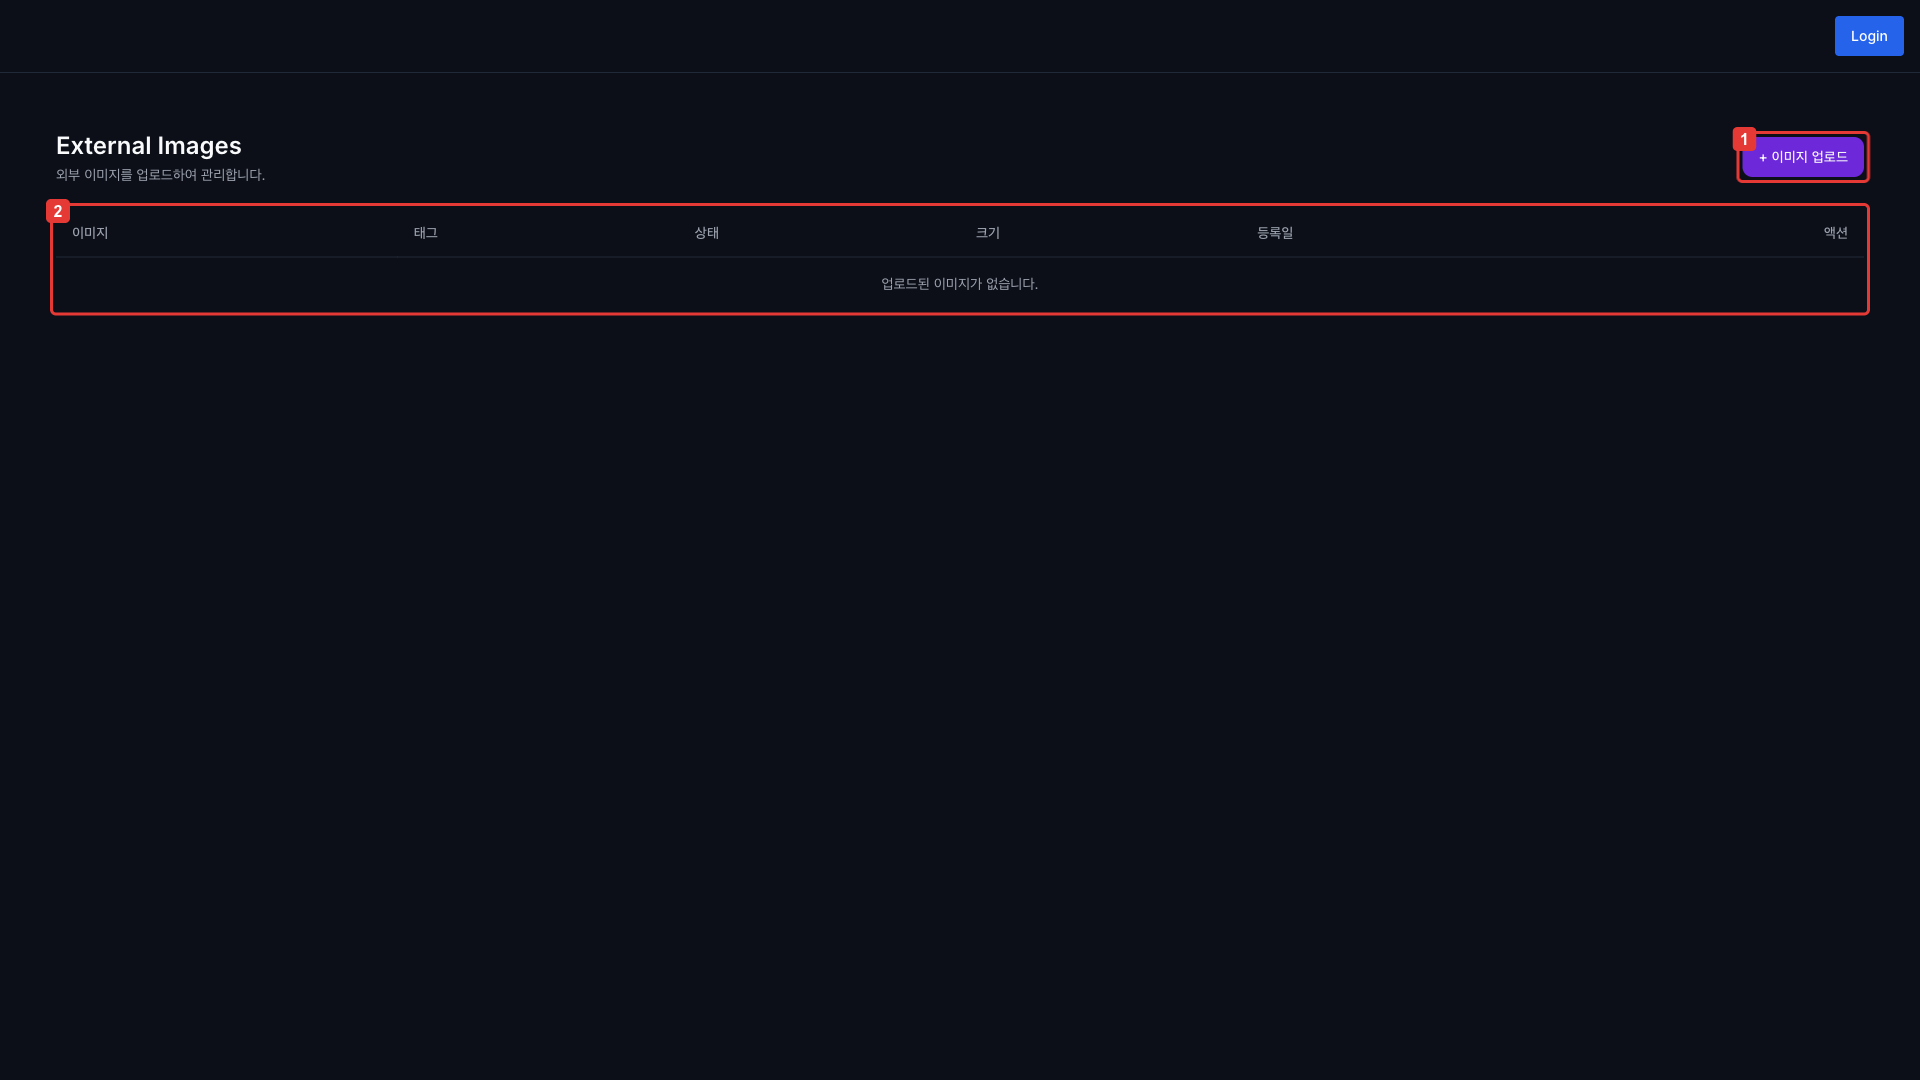
| No. | Description |
|---|---|
| ① | Image upload button — opens the tar file upload dialog. |
| ② | Table of uploaded external images |
Columns
| Column | Description |
|---|---|
| Image | The image name registered in the internal registry |
| Tag | Image tag |
| Status | Current processing status (see status notes below) |
| Size | Image file size |
| Registered at | Upload start time |
| Action | Delete button |
Status badges
| Status | Description | Action when abnormal |
|---|---|---|
| Pending | Waiting for upload | Refresh after a moment. |
| Uploading | tar file upload in progress (spinner shown) | Check your network. |
| Importing | Importing into the internal registry (spinner shown) | Wait a moment. |
| Completed | Import complete. Selectable in Serving/Lab. | — |
| Failed | Import failed. Click the badge to view the error message. | Check the error dialog, validate the tar file, and upload again. |
Upload an image
To register an external container image in the internal registry, follow these steps.
-
Save the image to upload as a tar file using
docker save.docker save -o my-image.tar my-registry.com/my-image:tagA single tar file can contain multiple images.
docker save -o multi-image.tar image1:tag1 image2:tag2 -
Click the + Upload Image button at the top-right of the External Images list page.
-
In the upload dialog, drag & drop the tar file or click the file-select button to choose a file.
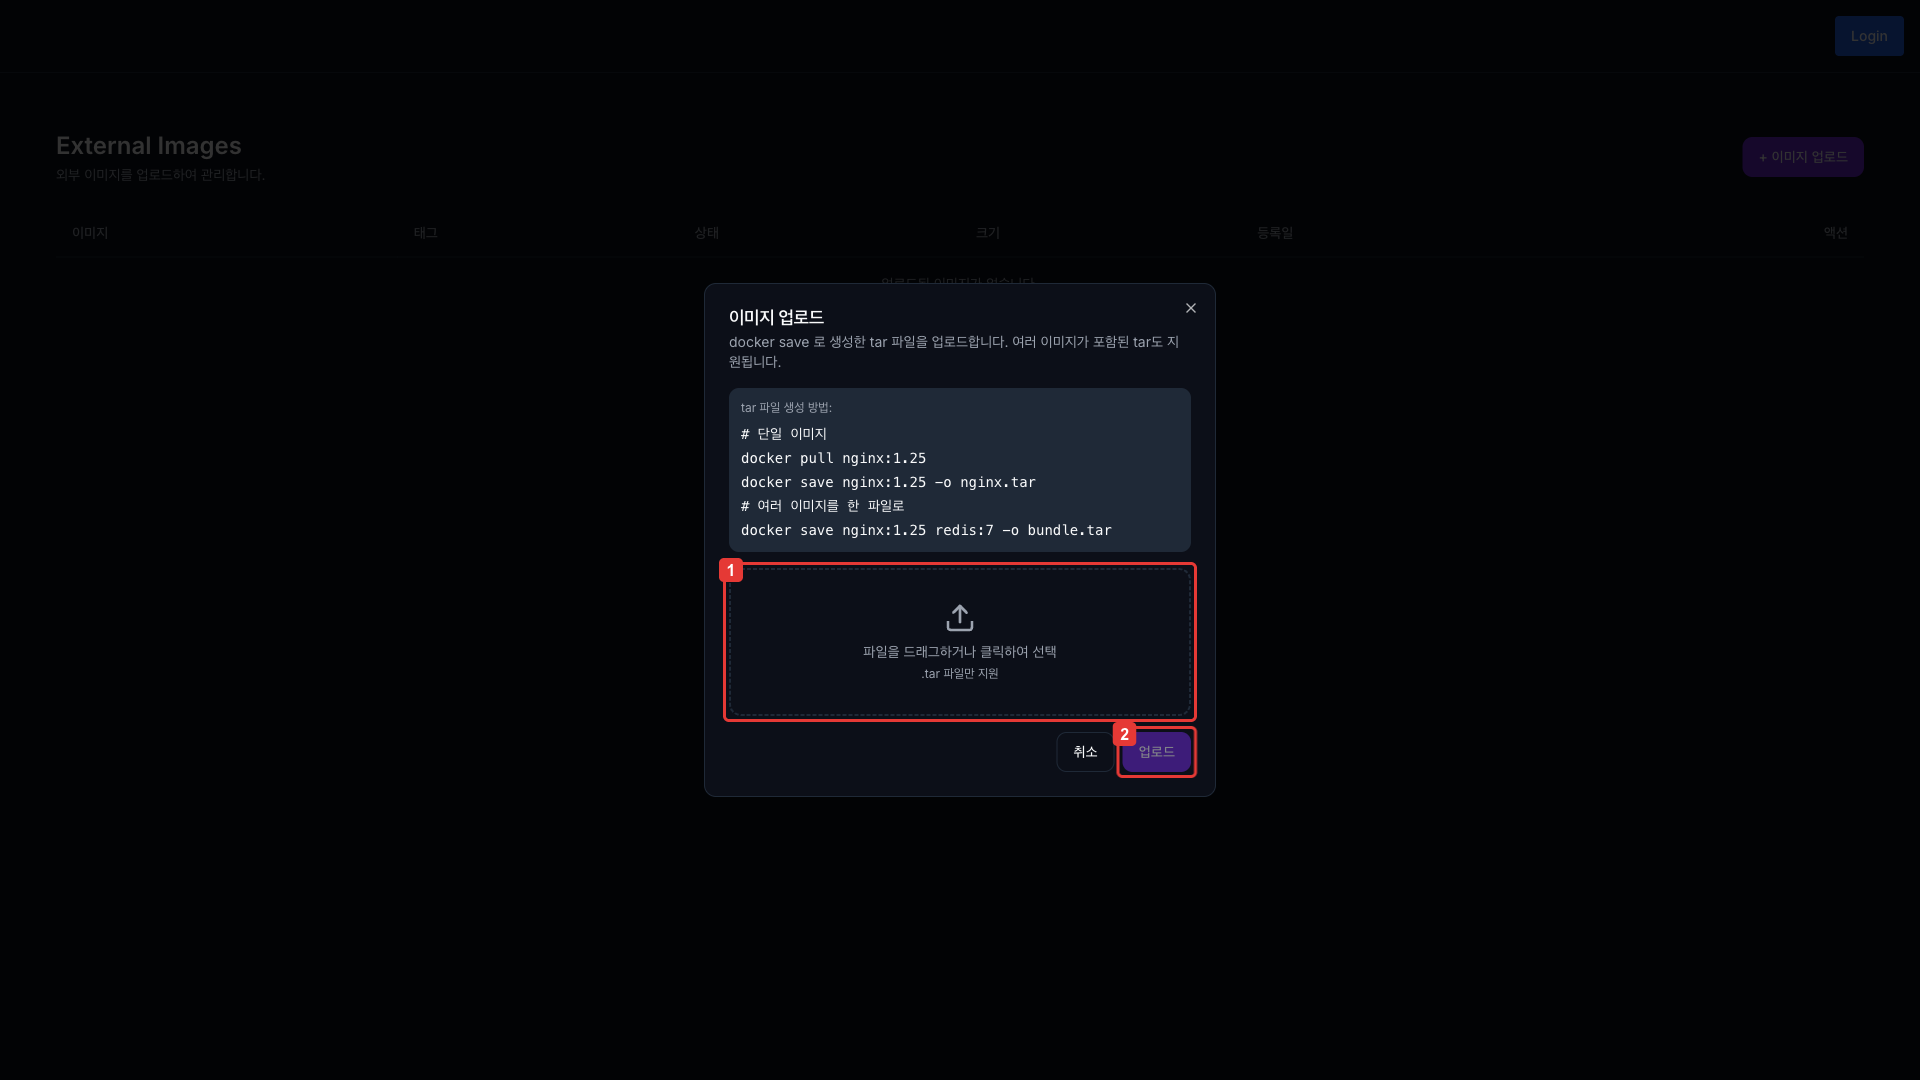
| No. | Description |
|---|---|
| ① | tar file select button (drag & drop or click to choose a file) |
| ② | Upload start button. Enabled after a file is selected. |
-
Click the Upload button. The upload proceeds as a chunked upload, and you can see the progress in the status bar.
-
When the upload completes, the status changes from Importing to Completed. After completion, you can select the image from the 'Uploaded Images' group when creating a Serving or a Lab.
Delete an image
In the list, click the Delete button for the image you want to remove. A confirmation dialog appears before deletion.
Deleted images are also removed from the internal registry. If any Serving or Lab is using the image, those workloads may be affected.